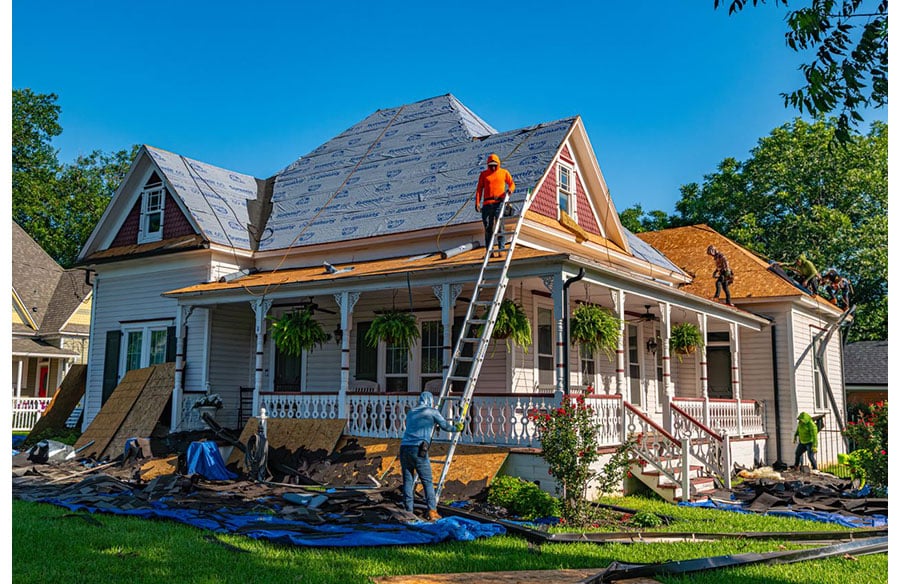
Replacing a roof can feel like a big undertaking, especially if you’ve never gone through it before. Between choosing materials, scheduling contractors, and figuring out what actually happens on installation day, it’s easy to feel a little lost. The good news is that the process, while involved, follows a fairly predictable sequence of steps. Knowing what to expect ahead of time can make the entire experience far less stressful.
Here’s a breakdown of how a typical roof replacement unfolds, from the first phone call to the final walkthrough.
1. Initial Inspection and Assessment
Every roof replacement starts with an inspection. A roofing professional will examine the current condition of your roof, checking for structural damage, water intrusion, ventilation issues, and the overall state of the decking underneath the shingles. This step matters because it determines whether a full replacement is actually necessary or if targeted repairs might extend the roof’s life a bit longer. During this visit, the contractor will also take measurements to calculate the materials needed.
2. Choosing Materials and Getting an Estimate
Once the inspection is complete, you’ll move into decisions about materials. Asphalt shingles remain the most common choice due to their balance of cost and durability, but options like metal, wood shake, or composite materials are also worth considering depending on your budget and the look you want. Your contractor should walk you through the pros and cons of each, along with how local weather conditions might affect performance over time. This is also when you’ll receive a written estimate outlining labor, materials, disposal fees, and an estimated timeline.
3. Permits and Scheduling
Most municipalities require a permit before roofing work can begin, and a reputable contractor will typically handle this on your behalf. Once permits are approved, you’ll schedule a start date. Keep in mind that scheduling can shift based on weather, since roofing crews generally avoid installing new materials during rain or high winds.
4. Delivery of Materials
Shortly before the project begins, materials are delivered to your property. It’s common to see pallets of shingles or metal panels staged in the driveway or yard a day or two in advance. This is a good time to move vehicles, patio furniture, and anything else you’d rather keep out of the work zone.
5. Tear-Off of the Old Roof
On the first day of the actual project, the crew removes the existing roofing material down to the decking. This step is noisy and can generate a fair amount of debris, so it’s normal to hear activity throughout the day. Removing the old layer also gives the crew a chance to inspect the decking for rot, soft spots, or water damage that wasn’t visible from the outside.
6. Repairing the Decking
If any damaged decking is found during tear-off, it gets replaced before installation continues. Skipping this step is one of the most common shortcuts in low-quality installations, so it’s worth confirming with your contractor that any necessary repairs are included in your estimate rather than treated as a surprise add-on later.
7. Installing Underlayment and New Roofing Material
Once the decking is solid, the crew installs an underlayment layer, which acts as a moisture barrier between the decking and the new shingles or panels. From there, the new roofing material goes on, along with flashing around chimneys, vents, and skylights to prevent leaks in vulnerable areas.
8. Cleanup and Final Inspection
After installation, a thorough cleanup should take place, including a check for stray nails using a magnetic sweeper. A final walkthrough with your contractor lets you review the completed work, ask questions, and confirm that everything meets your expectations before final payment.
How Long Does It Take?
For most homes, the actual installation takes one to three days, though the full process from inspection to completion, including permitting and scheduling, can span several weeks. Weather plays a significant role in timing, which is one reason experienced providers of roof replacements in Tacoma often build extra flexibility into their scheduling to account for the region’s frequent rain.
Final Thoughts
Understanding each stage of the process helps set realistic expectations and makes it easier to spot a contractor who’s cutting corners. Whether you’re comparing quotes or already have a project scheduled, asking questions at each step, from material selection to decking repairs, puts you in a stronger position to make informed decisions. For homeowners weighing their options, working with an experienced team that specializes in roof replacements in Tacoma can make the process smoother from start to finish.