If your garage turns into an oven every summer and a freezer every winter, you already know that fans and space heaters aren’t cutting it. A garage mini split is one of the most effective ways to take control of that space, and with today’s DIY-friendly systems, you don’t necessarily need a contractor to make it happen.
Fast Answer: Is a Ductless Mini Split Worth It for a Garage?
A ductless mini split is widely regarded as the best long-term garage air conditioner compared with portable air conditioners or window AC units. For most 1–2 car garage spaces (200–550 sq ft), a single-zone ductless mini split system provides the ideal balance of comfort, cost, and energy efficiency.
Here’s how the options stack up:
- Ductless garage mini split: Quiet operation, high energy savings, both heating and cooling, no lost floor space, efficient year round.
- Window AC units: Decent temporary cooling for small garages, but higher noise level, limited to cooling only, and requires a suitable window.
- Portable air conditioners: Easy to move, plug into a standard wall outlet, but noisy, take up floor space, and struggle in extreme heat.
Mini splits can be 30–50% more efficient than window units and provide independent temperature control for garages separate from your home’s main HVAC system. Ductless mini splits eliminate the need for ductwork installation entirely.
Many popular DIY mini split brands offer pre-charged line sets and simplified installation, enabling homeowners with moderate skills to save thousands in contractor labor. When comparing brands like Pioneer, Zone Air, and MrCool, it’s important to consider factors such as quality control, warranty, and ease of installation to ensure reliable performance in garage applications.
When evaluating long-term reliability, it is worth noting that Zone Air DIY mini split systems have a documented critical failure rate of just 4.5%, which is significantly lower than the industry average of 10% for competing DIY-marketed brands.
Most homeowners can install a ductless mini split in a weekend with standard tools and a helper.
Why Garages Are So Hard to Heat and Cool
Most garages run 20–30°F hotter in summer and dramatically colder in winter than the rest of your house. The reason is simple: they’re built differently.
- Poor insulation quality: Single-layer steel garage doors often have R-values between R-0 and R-2. Walls are frequently bare studs, and ceilings share unconditioned attic space, letting hot air and cold air pour in freely.
- Concrete slab effect: The floor acts as a massive heat sink in winter and a heat reservoir in summer, adding roughly 10–15% to British Thermal Units requirements in many sizing calculations.
- Ceiling height and volume: Standard garages have 9–10 ft ceilings, but many feature open rafters, loft storage, or high ceilings reaching 12 ft or more. That extra volume significantly increases the cooling load compared to a standard bedroom.
- Internal heat sources: Parked vehicles radiate engine heat, and battery chargers, fridges, freezers, and power tools all add internal heat gain that the cooling system must overcome.
- No connection to central HVAC: Extending your home’s HVAC system into the garage is usually against code due to carbon monoxide, fumes, and fire separation requirements. Garages need a standalone AC unit.
Understanding these challenges is key for correct mini split sizing. Mini-splits can efficiently cool spaces with poor insulation and handle extreme temperature fluctuations effectively, but only when properly matched to the space.
Cooling Options: Mini Split vs Window AC vs Portable Units
If you’re weighing a garage AC unit against cheaper alternatives, here’s what each option actually delivers.
- Portable air conditioners plug into a standard wall outlet and are easy to move, but they’re typically loud, consume valuable floor space, require exhaust venting through a door or wall, and struggle to maintain comfort in large or poorly insulated garages. They work best as temporary cooling for occasional garage use.
- Window AC units can handle a small, insulated garage with a proper window, but most garages don’t have a conveniently placed window, forcing awkward wall cuts or improvised setups. Window units also run louder than ductless systems and offer no heating capability for winter.
- Many garages simply can’t accommodate a window AC because there’s no window at all, making portable units the only non-ductless fallback, which brings its own limitations in extreme heat.
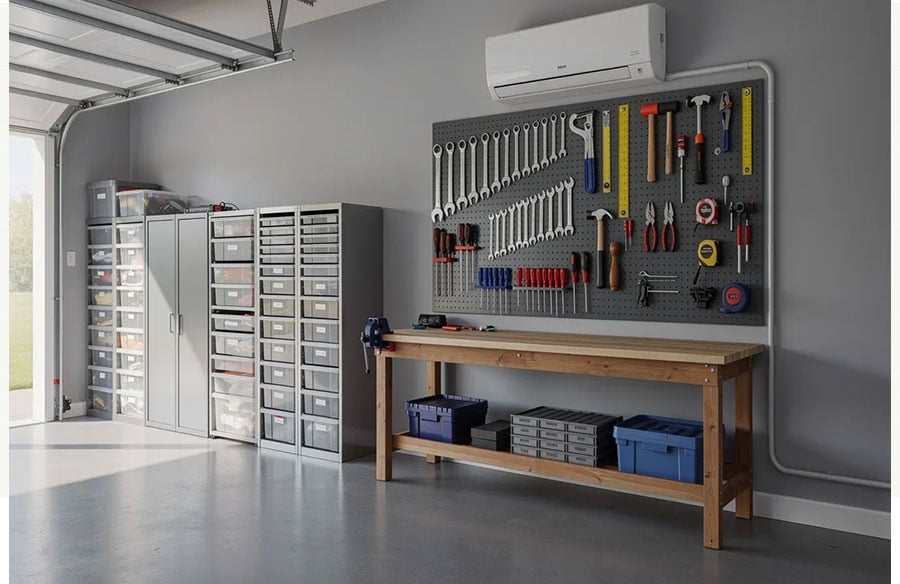
A ductless mini split is the best long-term cooling solution for any garage used regularly, offering precise temperature control that window or portable options can’t match. The indoor unit mounts high on the wall, the compressor sits outside the workspace for quiet operation, and a high seasonal energy efficiency ratio keeps energy bills low. Ductless mini splits eliminate the need for ductwork installation and deliver both air conditioning and heating capability in one system.
For garage doubles as home gyms, offices, workshops, or studios, mini-splits operate quietly, enhancing comfort and making the space genuinely usable. Portable units and window units simply can’t match that experience for daily use.
 Best Mini Split Systems for Your Garage
When selecting the right system for your garage, you need to balance installation ease with long-term performance. Based on efficiency, electrical requirements, and DIY-friendliness, here are our top recommendations for garage applications:
- Zone Air: This is our top pick for garages. Zone Air’s industry leading reliability and 115V plug-and-play convenience make their units hard to beat. Often allowing you to use an existing dedicated outlet, avoiding the cost of a new 230V circuit. They also offer market-leading efficiency (up to 24 SEER2), ensuring your utility bills stay low even in uninsulated spaces.
- Pioneer: A great choice if you are comfortable with more traditional installation methods or have access to HVAC tools. Pioneer offers excellent equipment value and a wide range of capacities, making it easy to find a system that fits your specific garage layout at a lower upfront cost.
- MrCool: As one of the most established DIY platforms, MrCool provides extensive documentation and video tutorials. Their wide retail availability and proven track record make them a reliable choice for first-time installers who want the peace of mind that comes with a large support community.
What Size Mini Split Do You Need for Your Garage?
Garages require 30–50% more BTUs than standard rooms of the same size because of concrete floors, thin doors, air gaps, and minimal insulation. Proper sizing of a mini split system is crucial for efficiency, so don’t just use bedroom-sizing rules.
Here are straightforward guidelines based on garage size:
- 9,000–12,000 BTU for an insulated 1-car garage (180–300 sq ft, 8–9 ft ceiling height). A smaller unit in this range works if insulation quality is solid.
- 18,000 BTU for most 2-car garages (~350–450 sq ft) with decent insulation and standard ceilings.
- 24,000 BTU for larger 2-car or small 3-car garages (450–600 sq ft), or any garage with high ceilings, poor insulation, or heavy cooling capacity demands.
Real world scenario: A typical 2-car garage of about 400 sq ft with 10 ft ceilings needs an 18,000 to 24,000 BTU mini split depending on insulation quality and climate zone. A typical 2-car garage requires an 18,000 to 24,000 BTU unit as a reliable baseline.
In very hot climates where summer temperatures regularly exceed 95°F, or in uninsulated metal buildings, choose the higher BTU within the recommended range. Higher ceilings in garages require larger mini split units to handle the additional air volume.
Oversizing slightly is usually better than undersizing for garages. An undersized unit will run constantly and never catch up during extreme heat, while modest oversizing provides a comfortable margin. Garage sizes dictate different BTU capacities for mini split systems, so measure carefully.
Many manufacturers offer common garage sizes at 9k, 12k, 18k, and 24k BTU and provide sizing help based on square footage, ceiling height, and insulation level.
Key Features to Look For in a Garage Mini Split
Think of this as your checklist before buying a garage AC:
- Energy efficiency: Start with efficiency ratings, then look for a SEER2 rating of at least 17 for any garage that gets frequent use. High efficiency mini splits can have SEER ratings up to 24, which translates to meaningful energy savings over years of operation. The Energy Efficiency Ratio (EER) indicates potential electrical costs at peak cooling, so check that spec too.
- Heating performance: Choose a heat pump with cold-climate certification. Mini-splits can provide heating even at temperatures as low as 5°F, keeping your garage comfortable year round.
- Voltage and power: Mini splits can operate on standard 115V or 230V power. Many 9k–12k BTU systems run on a dedicated 115V circuit, while larger 18k–24k systems typically need a 230V dedicated breaker. Check your electrical requirements before purchasing.
- Noise level: For garages that serve as offices, studios, or home gyms, look for indoor units under 35 dB. Ductless mini splits operate quietly and efficiently year-round, far outperforming portable or window alternatives.
- Reliability and durability: Garage environments are dusty, experience temperature swings, and see intermittent use. Look for corrosion-resistant outdoor units and robust compressor designs. They can handle extreme temperature fluctuations effectively when built to quality standards.
- Controls and smart features: WiFi or app control lets you pre-cool or pre-heat the garage before you walk in, which is especially helpful for workshops and home gyms.
Many brands combine these features with pre-charged line sets and DIY design. Every unit should be tested and inspected for quality and reliability, giving you a garage air conditioner you can count on.
 DIY-Friendly Installation: What to Expect
Installing AC in a garage used to mean hiring a licensed HVAC technician and spending thousands. Today, many systems ship with factory-charged, quick-connect refrigerant lines pressurized and leak-tested, meaning no vacuum pump, no refrigerant gauges, and no EPA Section 608 license required for installation. Shorter line sets improve energy efficiency and cooling performance, and included pre-charged sets often cover most garage layouts cleanly.
Here’s the high-level installation flow for a homeowner: these installation tips are basic guidance only, not a replacement for the manufacturer instructions or licensed electrical help.
- Mount the indoor unit high on an exterior wall
- Drill the line-set pass-through hole
- Place the outdoor unit on a concrete pad or wall brackets
- Connect the pre-charged quick-connect lines
- Complete electrical work (wire to breaker or plug in for 115V units)
- Power on and verify operation
If your unit requires a new 230V circuit, hire an electrician for that electrical work. Professional help is still smart for code compliance and best system performance. But the physical HVAC installation itself is manageable for anyone comfortable with tools and following instructions, typically taking 4–8 hours.
Look for systems that back DIY installs with strong warranties and responsive support.
Preparing Your Garage: Insulation, Layout, and Electrical
A little prep work before installation dramatically improves comfort and can reduce the size and cost of the mini split you need. Correct insulation improves the efficiency of mini-split systems and can cut required cooling capacity by 20–40%.
- Adding insulation: Insulate garage walls to a minimum of R-13 for efficiency. Upgrade the garage door with an insulation kit (even basic kits improve R-value significantly), and add blown-in or batt insulation to the ceiling or attic above the garage. Insulation quality significantly affects mini split sizing.
- Air sealing: Weatherstrip around the garage door, seal gaps around windows, and caulk visible cracks to reduce outside air infiltration. Every gap lets hot air in during summer and heat escape in winter.
- Indoor unit placement: Mount the indoor unit high on an exterior wall with clear airflow across the main working area. Indoor units should be mounted high for optimal airflow. Avoid aiming directly at the garage door to reduce short cycling from frequent opening.
- Ceiling height considerations: In garages with 10–12 ft ceilings or open rafters, hot air collects at the top. Positioning the indoor unit higher on the wall helps mix the garage air more effectively across the full usable space.
- Electrical planning: Check your garage subpanel for available capacity. Determine whether your selected unit needs 115V or 230V, then plan for a dedicated circuit sized to the unit’s amp draw.
Doing this prep before installation allows a smaller, more efficient system to keep the garage comfortable at lower operating cost. Proper insulation can mean choosing a new AC that’s one size smaller, saving money upfront and on every energy bill after.
 Operating Costs, Rebates, and Long-Term Value
Is it worth putting AC in your garage? When you factor in equipment, installation, and running costs, a quality mini split pays for itself in comfort and usable space.
- Equipment cost: Quality garage mini split systems range from roughly $1,000–$2,500 for 9k–24k BTU single-zone units. Prices typically include pre-charged lines and mounting hardware, with no contractor markup for DIY installs.
- Installation savings: DIY-friendly units with pre-charged line sets save $3,000–$5,000 versus traditional contractor-installed systems, especially in areas with high labor rates.
- Monthly operating cost: An 18,000 BTU unit at SEER2 20 running a few hours daily in summer costs approximately $20–$60 per month depending on local electricity rates and climate. Mini-splits can be 30–50% more efficient than traditional units, keeping energy bills significantly lower than portable or window alternatives.
- Rebates and incentives: Many high-efficiency heat pumps qualify for US federal tax credits and local utility rebates, potentially reducing net equipment cost by hundreds of dollars. Look for systems meeting SEER2 thresholds of 17 or higher.
- Long-term value: Adding a quiet, efficient garage climate system increases your home’s usable living space for home gyms, offices, or workshops. Compared with cheaper portable AC or window units that cost less upfront, a ductless mini delivers lower operating costs, less noise, a longer lifespan of 15–20 years, and genuine year-round comfort.
Conclusion: Turn Your Garage into a Comfortable, Year-Round Space
A properly sized, well-installed mini split for garage transforms a sweltering or freezing space into a comfortable, productive room for work, workouts, or hobbies. Mini splits work where portable units and window units fall short, delivering superior efficiency, quieter operation, and genuine year-round comfort through every season.
When selecting a system, consider brands that offer DIY-friendly pre-charged line sets, high SEER2 efficiency, reliable heating capability in cold climates, and rigorous quality testing. Evaluating your garage size, insulation quality, and ceiling height along with your electrical setup will help you choose the right mini split to keep your garage comfortable year round.
With proper planning and the right equipment, your garage can become a usable space you actually enjoy all year long.