Are you considering updating your home with an affordable and long-lasting flooring solution? You may want to consider installing laminate flooring. In this blog post, we will outline a step-by-step guide to installing laminate flooring at home. This guide will be useful for both experienced DIYers and newcomers looking to take on a new project, so we have made it as straightforward as possible to guarantee that anyone can achieve the result they are after. Let’s get started with creating an amazing space to live in by installing beautiful laminate flooring.
Tools for the job
Two little-known tools help guarantee a better DIY laminate installation that you may not know about. These are the oscillating saw and heavy-duty adjustable spacers.
Undercutting door jambs and performing intricate cuts using an oscillating saw. You can use an oscillating tool to undercut your door jamb, allowing you to slide your flooring underneath for a clean, seamless look. You can also use it for curved or intricate cuts around toilet flanges and tricky corners. You can cut around a jamb and see chipped pieces if you use a regular handsaw or a simple jamb saw. You can also use a scrap piece of wood under your oscillating saw to cut your jamb to the right height so your new floor will sit perfectly. This way, you don’t have to fudge and end up with a jagged edge cut around your jamb like a pro. You can also use adjustable and stable spacers. Unlike thin plastic spacers that can easily be knocked over or slide in the middle of your installation, these adjustable spacers keep your layers of planks upright against the wall, even if the wall is not perfectly straight or your cut around corners is. You can easily paste and remove them when laying your first row of planks or when starting work in a different room. Having a dozen of these heavy-duty spacers makes sure your planks will not move out of place, causing gapping or uneven joints with the rest of the planks in your homemade laminate flooring.
Having the right cutting and fitting equipment makes laminate installation significantly easier and helps you achieve cleaner, more professional-looking results. If you don’t already own one, sourcing a reliable power tool before starting can save time, reduce wasted boards, and prevent messy finishing work around door frames and corners.
Prepare the room
First, remove furniture and appliances and remove all baseboards in the area where the laminate will be installed. Then determine whether the subfloor is level using a 6- to 10-foot straight edge. Mark any high and low spots that are more than 1/8 inch low or high in a six-foot span. If the subfloor is uneven, be sure to use screws of the same height as set by a laser level as depth guides before pouring the self-leveller. This guarantees you’ll get a truly flat subfloor rather than one that’s only flat in the dips. After that, seal all holes and gaps around the perimeter of the room using dams made from 1/4-inch sill foam or strips of plywood, and caulk to keep the levelling compound from seeping into unwanted spaces. Lastly, prime the entire subfloor with a diluted primer mixture (usually 1:1 with water, or as instructed in the product) and allow it to dry fully to enhance adhesion of the self-levelling product. Be sure to use only a self-leveller compatible with your subfloor. For instance, you can use Laticrete Next Level Plus self-leveller directly on primed exterior-grade plywood.
Measure your space
Measure the length and width of the room at multiple points, as well as near entryways and around built-in cabinets, nooks, crannies, and other features. Remember that rooms and walls are rarely perfectly square. Multiply the longest lengths together to estimate the space’s square footage, then add 10-12% more to account for “waste” for matching and trimming. When determining layouts around complex obstacles in the room, be sure to sketch a rough floorplan with all dimensions noted. Before cutting laminated boards for the first time, make a layout sheet. Add up the widths of the planks in order, then subtract the total from the critical points where you’ll have to make a rip cut (such as cabinet outlines or vent cutouts). This way, you can anticipate any layout problems before you start. This is useful if you find yourself with a narrow, hard-to-install “sliver” of laminate at one of the walls, so you can either adjust your starting board or rearrange the layout so that your rip cuts are 2 inches or wider for an easier fit. This also helps you achieve a balanced, professional look throughout the layout.
Lay down the underlay
Choose which type of underlay best suits your subfloor and the room. If you have a concrete subfloor or moisture is a concern, you may want to use an underlay with a built-in vapour barrier. If your subfloor is wooden and dry, foam or cork underlay is already sufficient for sound suppression and minor levelling. Lay the underlay perpendicular to the planks, using a utility knife to cut it to fit the corners of the room. Butt the underlay sheets together – do not overlap the seams – tape with underlay tape the seams of each strip so they won’t shift when installing. Make sure to lay the underlay flat, without wrinkles and folded edges, and the edges reach the walls (but do not climb them) to avoid an uneven floor and squeaky sounds.
Set up a straight line to follow
Laying a perfectly straight starter line is key to make sure your laminate floor ends straight. Using the width of a plank plus the recommended expansion gap, mark two points at each end of the room, parallel to the main wall, where you plan to start laying the flooring. Grab a piece of chalk, position the rope right above the two points, pull it taut until the chalk-stained side faces down on the floor, and snap. This is your ideal reference line, so make sure to lay down the first line of planks with their long sides perfectly aligned with the chalk. Keep checking your layout against this line often, as any deviation or shift on the first few planks will be noticeable when the floor area increases.
Lay the first row
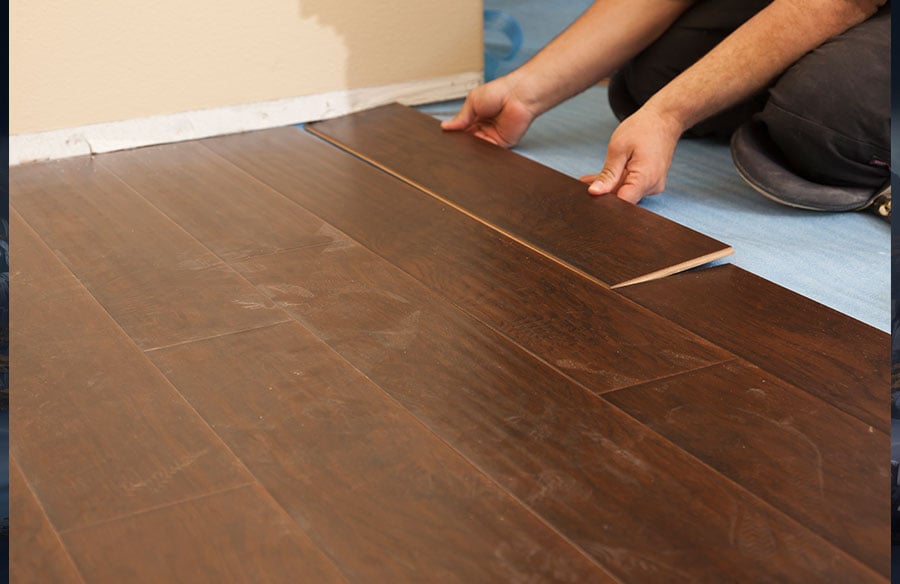
Start with a straight line. The most accurate way of doing this is to measure from the base plate of the outside wall of your home (not the outside wall itself since there’s drywall on that wall and it’s not perfectly linear) – if you must use this, be sure to take off a little bit of the drywall around the edge of the floor, just bare enough to expose the base plate. Then take your measurements and pass a chalk line care across the floor using the baseline. After this, take 3 or 4 boards, push them together but don’t lock them, and place them along the chalk line with the tongue side facing the wall you’re laying the boards beside.
Once you’re sure they’re in position, take to cutting 6-inch lengths of some scrap laminate wood and lock them at the ends and in the seams of the joined boards you’ve just positioned alongside the straight line. These pieces should be screwed into the floor (not through the locked boards). Take three or more measurement checks to ensure the distance between the boards, and either the straight line or the wall remains constant (e.g., always 3 1/2 inches from the wall). This guarantees no shifting of boards or misalignment – homes after installation issue caused by a laid floor not being properly straight from day one.
Mark and cut a board to fit
To be perfectly accurate with your marks on the last row, it’s best to lay one full-length board exactly over the last row already laid and lock this line in. Have its tongue side face the wall as you use the sharp edge of a groove on a waste piece to make the mark. Place the groove against the wall and lay a pencil on the other side, running the tip along the groove edge to make a pencil line. This eliminates the need to measure to accommodate the 1/4-inch gap you’ll need to leave along the wall for expansion, because the mark is made with the groove, which will, in turn, leave a gap by default.
If you’re measuring a large area and need to lay perfectly cut lengths of wood across the house, group 10 planks together and take the combined measurement with a tape measure. Pay special attention here to the technical detail: start your measurement from the number one end of the tape by laying your finger on the number one (so that the number itself is not included in the measurement). Take note of the measurements and subtract 1 inch, since it’s not included in your measuring tape. Use this number as your cheat sheet for taking the layout lines across the house to check if all measurements are consistent. Once you have cut 2 short sections of equal length, join 5 or 10 planks together and measure along them to double-check if your measurements along the length of the area are consistent. This step is crucial, as any measurement errors are compounded by the number of new wood lengths or seams you lay across the house.
Fit the remaining rows
Instead of locking tongue-and-groove joints in the next row one by one, do it all at once off to the side. Assemble the entire row by screwing the boards together flat on the floor until you create sections of 2 or 3 boards. This trick helps create a straight, well-aligned joint and prevents knocking the last row’s boards and seams out of square. Remember to use the 12” minimum leftover piece from the previous row to start your new row, staggering joints from the previous rows by at least 8” for strength and aesthetics. Use a tapping block or wooden mallet to tap the pieces together until there are no visible gaps – especially in the middle of the rows, where pieces are most likely to drift apart. For the final row, carefully measure the distance from the wall to the last perfectly fitted row, subtract the 3/8” expansion gap, and rip the boards to fit. Make sure to use a pull bar to bring the last block of your final row tight against the rest of the floor.
Fitting around doors
Mess with the plank joints and pseudo “glue them” if you have to make them slide in. For threshold and door frame areas where you can’t angle the plank to make it fit, you may need to plane out the plumb of the groove lip of the butt and long side joints of the plank that slides in. You may do this with your small planing tool or a utility knife; 1 to 2 strokes should be enough. Once you do this, slightly moisten both mating joint surfaces with a wet cloth to activate the adhesive (use clear Gorilla glue for vinyl or wood, or laminate glue). Spread a thin bead of glue on the joint and slide the plank in place. Press the joints tightly together. Seal the joint tightly with duct tape so no separation or gaps can form while the glue cures, which is often a problem at doorways.
Make barrel cuts on the board end and undercut the door trims or jambs. Not a straight cut, but a barrel cut on the board end that slides under the door frame to make sure the door frame has enough space to sit flush without showing gaps. You must also undercut the door trim or jamb with an oscillating tool, using the scrap piece of your flooring as a depth guide, so the newly installed floor can slide under the trim and jamb to keep everything looking flush and neat. Use the utility knife’s outer edges as a shoe horn to cut the underlayment pad and push the plank with the trowel to compress the underlayment.
Conclusion
Putting laminate wood flooring down may seem overwhelming at first, especially if you have uneven flooring, crooked walls, or are trying to figure out how to cut around all those pesky door casings without messing them up! But with the proper preparation, it becomes much easier (and the finished product looks better, too).
Focus on the things that matter first: getting your subfloor level, laying out your pattern in such a way that you don’t end up with weird little slivers of laminate, using a straight chalk line to mark where your rows will go, and taking your time cutting around any thresholds or door jambs to get a smooth transition from one area to the other.
Most importantly, don’t rush; laminate floors appreciate being treated with care and precision. When combined with good spacing, quality tools, and smart cutting techniques, you can have an attractive, durable laminate floor that looks professionally installed and gives you pride in walking on it every single day.