AI text-to-3D generation has matured to the point where you can describe an object in plain language and get a textured 3D model you can actually use. Whether you’re a game developer prototyping a prop, a designer exploring concepts, or a maker preparing a print, tools like Meshy can turn a written idea into a digital asset in minutes. This guide walks through the full process, from writing a good prompt to exporting a model that fits your project, and sets realistic expectations along the way.
What Is Text-to-3D Generation?
Text-to-3D generation uses AI to create a three-dimensional mesh from a text description. Unlike text-to-image tools that produce a flat picture, a text-to-3D model has actual geometry you can rotate, texture, and export into other software. AI models interpret your words to generate shape, and often apply materials and colors automatically. The result is a model that can be used in game engines, 3D printing slicers, or web viewers, though the quality and usability depend heavily on the input prompt and the tool you’re using.
It’s important to distinguish text-to-3D from generating 3D-styled images. Some tools, like Canva’s AI 3D model generator, produce an image that looks like a 3D render but is not an actual model with depth and exportable geometry. For tasks that require a mesh you can import into Blender or Unity, you’ll need a dedicated text-to-3D generator. This guide focuses on the genuine article, models with vertices, edges, and faces that you can manipulate and export.
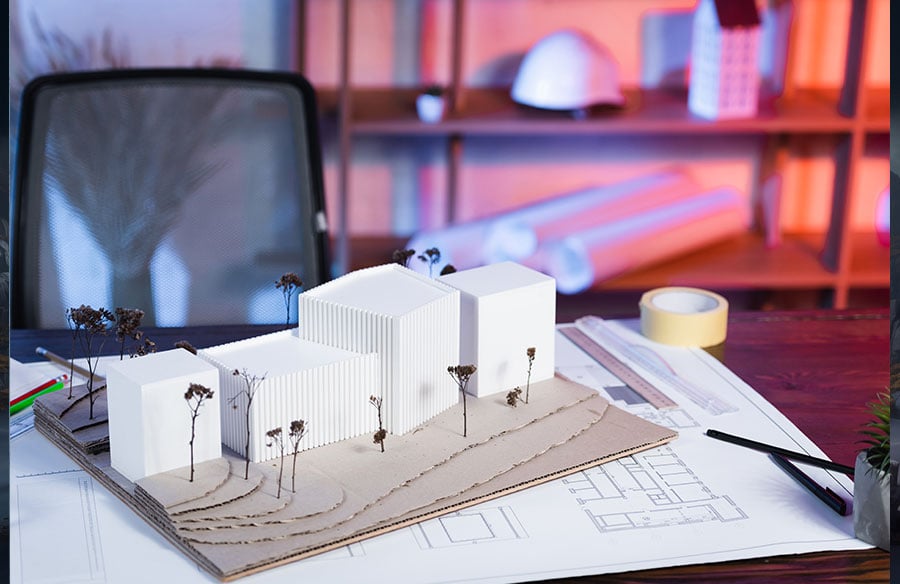
For architects and designers, this capability transforms conceptualization. Instead of relying on flat renders, one can generate tangible forms to explore spatial relationships, material interactions, and structural possibilities directly within a 3D environment, fostering a more intuitive understanding of a design’s physical presence.
Step-by-Step: Generating a 3D Model from a Text Prompt
Most text-to-3D tools follow a similar workflow, but we’ll use Meshy as the primary example because it’s browser-based and offers a straightforward interface. Here’s a step-by-step process that works for most platforms.
At this stage, you can try prompt to 3d model workflow, then inspect the result in your target 3D tool before using it downstream.
1. Write a Detailed Prompt
The quality of your output starts here. Use a formula that includes the subject, material, and style. For example, “a low-poly wooden pirate ship, cartoon style, game-ready” gives the AI clear direction. We’ll dive deeper into prompt writing in the next section.
2. Input the Prompt into the Text-to-3D Tool
On the platform, you’ll find the text-to-3D option in the 3D Model workspace. Type your prompt into the text box. You don’t need to install any software; everything runs in the browser, which is one of the platform’s biggest advantages.
3. Choose Generation Settings
Depending on the tool, you may be able to select quality levels, style presets, or a polygon count. On the tool, you can often choose between low-poly and realistic styles. For a first try, the default settings are usually fine.
4. Generate the Model
Click the generate button. If the first result misses the mark, use the Free Retry button to re-roll the generation at no cost, or tweak the prompt and regenerate. Comparing a few attempts side by side is the fastest way to converge on what you want.
5. Inspect the Model from All Angles
Once generation is complete, rotate the model to check its silhouette, back side, and overall proportions. Look for any obvious deformities or floating geometry. AI models aren’t perfect, so this inspection step is crucial before you invest time in texturing or exporting.
6. Post-Process with Built-in Tools
Most platforms, including this one, provide post-generation tools. Use remeshing to clean up topology, AI texturing to apply materials, and rigging if you plan to animate. These tools can significantly improve the quality of your model before export.
7. Export in the Right Format
Finally, export the model in a format that suits your use case. We’ll cover the options in the next section. For example, export as STL for 3D printing or GLB for web and AR. Always test the exported file in your destination software to ensure compatibility.
This workflow is similar across other tools like Spline or Tripo, but the exact steps and interface differ. The key is to think of text-to-3D as a starting point that requires iterative refinement, not a one-click solution.
How to Write Better Prompts for 3D Models
Prompt engineering is the most important skill for getting good results from text-to-3D generation. A well-structured prompt can mean the difference between a model that looks right and one full of errors. Drawing from general AI prompt best practices and the platform’s official guidance, here’s a formula that works:
Subject + Material + Style + Technical Constraints
- Subject: Start with the main object. Be specific: “a vintage leather armchair” is better than “a chair.”
- Material: Describe the surface. “Polished brass” or “rough canvas” tells the AI what texture to use.
- Style: Set the art direction. “Low-poly, cartoon” or “photorealistic” changes the result dramatically.
- Technical Constraints: Add task-specific requirements like “low-poly” for games, “watertight” for 3D printing, or “T-pose” for animation.
Place the most important information at the beginning of the prompt, as recommended by OpenAI and other AI providers. For instance, “a low-poly wooden pirate ship, cartoon style” puts the subject and style first.
Here’s an example of a good prompt versus a bad one:
- Bad: “make a cool sword” (vague, no material, no style, no details)
- Good: “a longsword with an ornate silver pommel, dark leather grip, in a high-fantasy game style, game-ready” (lists subject, material, style, and technical constraint)
Avoid common pitfalls like listing too many separate accessories, which can cause disconnected geometry, the platform’s prompt guide specifically warns against this. Keep your prompt focused on one main subject with a clear silhouette. If the model doesn’t turn out right, revise your prompt and try again. Iteration is part of the process.
Choosing the Right Export Format for Your Project
After generating your model, you’ll need to export it in a format that works downstream. Here’s a quick comparison of common formats and their best use cases:
| Format | Best For | Pros | Cons |
| GLB | Web, AR, real-time | Compact, supports PBR materials | May need texture baking for some engines |
| FBX | Game engines, animation | Standard in Unity and Unreal, supports rigs | Can be proprietary, larger file size |
| OBJ | Static meshes, broad compatibility | Universal and simple | No animation, older material system |
| STL | 3D printing | Accepted by virtually all slicers | No color or materials |
| 3MF | Color or multi-material printing | Modern, supports color and metadata | Not all slicers support it |
| USDZ | Apple AR Quick Look | Optimized for iOS | Limited to Apple ecosystem |
For game development, FBX is often the go-to because it handles animations and bones well. For web and AR, GLB is the web standard: it’s compact and displays correctly in browsers and on mobile. For 3D printing, STL is still the simplest and most universally supported, though 3MF is growing in popularity for full-color prints.
The platform supports all of these formats, and you can also use its free online converter to change formats if you need something different than what you initially exported. A good practice is to test your exported file in the target software (e.g., importing the FBX into Unity) to verify that the scale, textures, and animations come through correctly.
What to Expect: Accuracy, Limitations, and Post-Processing
AI-generated 3D models have come a long way, but they’re not yet perfect. As one independent review notes, “AI-generated 3D models from images can achieve impressive accuracy for visual applications, but they are not always exact digital copies.” This holds true for text-to-3D as well. Common issues include:
- Geometry errors: Wrong number of faces, non-manifold edges, or holes.
- Topology issues: Dense, uneven meshes that are hard to edit or animate.
- Texture problems: Muddy textures, incorrect UV mapping, or baked lighting that looks wrong in a game engine.
These problems are more likely to occur when your prompt is vague, the object is complex, or the AI model has learned less about that particular subject. For foundational work, you’ll often see errors in symmetry, exact dimensions, or fine details.
Post-processing is an expected part of the workflow. As another article explains, “The initial AI-generated model is often only the starting point. Professional workflows typically include post-processing to improve mesh quality, textures, and overall usability.” You’ll likely need to:
- Clean up the mesh: Remove floating parts, merge overlapping geometry.
- Optimize topology: Use remeshing tools to create a cleaner, more efficient mesh for animation or real-time rendering.
- Fix textures: Adjust UVs, repaint textures, or use AI texturing tools to get the look you want.
- Check proportions: Scale and adjust dimensions to match real-world specifications.
The platform offers useful tools for this, including Smart Topology remeshing, AI texturing, and a viewer to inspect your model, but you may still need to edit in Blender, Maya, or a similar program for professional-quality results.
Remember that AI generation is a productivity booster, not a replacement for 3D artists. Complex or precision-focused projects will require human expertise and additional work. As suggested by industry analyses, combining AI generation with professional review is the most reliable approach for high-end work.
Practical Use Cases for AI-Generated 3D Models
So, what can you do with these generated models? Here are some real-world applications where text-to-3D is making a difference:
- Game Development: Create props, weapons, and environment assets quickly for prototyping or even final use after cleanup. Low-poly generation can give you game-ready assets in minutes.
- 3D Printing: Design figurines, models, or functional parts. With watertight geometry, you can export an STL and print it almost directly.
- Product Design: Generate concept models to visualize a product before manufacturing. You can create a digital prototype of a new chair or gadget and share it with stakeholders.
- Architecture & Interior Design: Generate furniture and decor items for visualizations or space planning.
This rapid generation of architectural elements and interior furnishings allows for quick iteration in design proposals. From exploring different facade textures to staging virtual rooms with diverse furniture styles, AI-generated models accelerate the visualization process, enabling clients and designers to make informed decisions earlier in a project’s lifecycle.
- Education: Create visual aids for teaching anatomy, history, or science concepts.
- AR/VR: Build assets for virtual experiences, retail visualization, or training simulations.
For each of these use cases, the workflow is similar: generate, post-process, and integrate. This guide’s emphasis on realistic expectations and careful inspection is especially important when your model is headed to a production pipeline.
How Meshy Compares to Other Text-to-3D Tools
To help you choose the right tool, here’s a comparison of Meshy with other popular text-to-3D generators. Keep in mind that pricing and features can change, so always check the current offerings.
| Tool | Generation Quality | Ease of Use | Export Formats | Pricing |
| Meshy | Good for game props and printing | Very easy, browser-based | GLB, FBX, OBJ, STL, 3MF, USDZ | Free plan with credits |
| Spline | Good for web elements | Integrates with Spline editor | GLB, FBX, OBJ | Free tier with paid plans |
| Sloyd | Good for parametric, game assets | Easy, but template-based for text | GLB, FBX, OBJ | Unlimited plan |
| Tripo | Fast, good quality | Easy | STL, OBJ, FBX, GLB | Free and paid |
| Fast3D | High quality, PBR | User-friendly | GLB/GLTF, FBX, OBJ/MTL, STL | Credit-based with free trial |
No tool is perfect for everyone, and your choice may depend on your specific needs. For instance, if you’re creating assets for web experiences where fast iteration is key, Spline’s integration might be appealing. If you need photorealistic scans of real objects, your best bet is a photogrammetry tool like Polycam, not a text-to-3D generator. The best approach is to experiment with a few tools to see which one fits your workflow best.
Wrapping Up
Turning a text prompt into a 3D model is now something any creator can do. By following a structured workflow, writing careful prompts, and understanding the limitations, you can integrate AI generation into your projects efficiently. Whether you’re making game assets, prototyping a product, or creating a model to print, such tools provide a practical starting point. The key is to treat generated models as the first draft: inspect, refine, and test them in your target environment. Now try writing your first prompt and see what you can create.
Frequently Asked Questions
Can a text prompt generate a usable 3D model?
Yes. A clear prompt can produce a textured base model that is useful for concepts, prototypes, and further refinement.
How detailed should a text-to-3D prompt be?
Describe the subject, material, visual style, and any important technical constraints. Concrete details are more useful than long strings of vague adjectives.
What should I do if the first result is not right?
Use Free Retry when available, adjust the prompt, and compare several attempts. Small prompt changes often improve shape, proportion, and texture.
Which export format should I choose?
Choose GLB for web use, FBX for game engines and animation, OBJ for broad compatibility, and STL or 3MF for 3D print