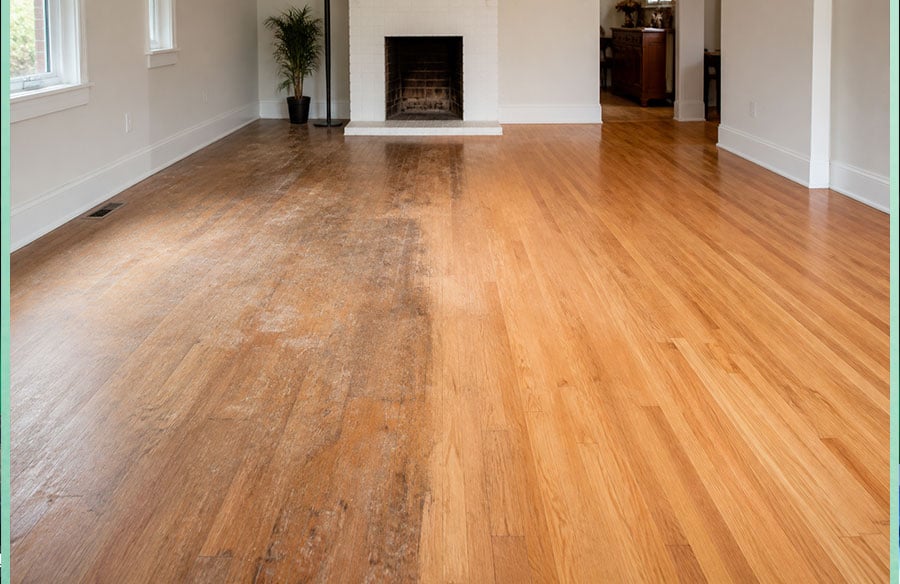
A worn hardwood floor can look worse than it is. Scratches, grey traffic lanes, an outdated stain, and a dull finish often affect only the surface. At the same time, a floor that still looks acceptable may be hiding moisture damage, loose boards, or too little usable wood for another sanding. That is why the decision to refinish or replace should begin with an inspection—not with colour samples or demolition.
Before removing anything, homeowners should identify the floor construction, check how much material remains, and determine whether the visible damage is cosmetic or structural. A careful assessment can preserve good wood, prevent unnecessary waste, and reveal repair work that must happen before any new finish is applied.
1. Confirm What Type of Floor You Have
Solid hardwood and engineered hardwood can look nearly identical from above, but they do not offer the same refinishing options. Solid hardwood is one piece of wood from top to bottom. Engineered flooring has a real-wood wear layer over a layered core, and the thickness of that top layer varies by product.
Look at an exposed edge near a floor vent, doorway threshold, stair nosing, or unfinished transition. A cross-section often makes the construction clear. If the floor is engineered, the manufacturer’s specifications may state whether sanding is permitted. Do not assume that every engineered product can be refinished; some allow a light restoration, while others have too little wood above the core for full sanding.
2. Check the Remaining Sanding Thickness
The important measurement is not the total board thickness. It is the amount of usable wood above the tongue-and-groove joint, or the remaining wear layer on an engineered board. Previous refinishing removes material, and an aggressive sanding can leave fasteners, board edges, or the tongue too close to the surface.
A professional assessment should examine several locations rather than relying on one convenient vent. Hallways, doorways, and high-traffic areas may have been sanded more heavily than the rest of the room. Uneven remaining thickness can change both the sanding plan and the final recommendation.
3. Separate Surface Wear From Board Damage
Surface scratches, faded stain, small finish cracks, and ordinary wear are often good candidates for restoration. Deep damage requires a different diagnosis. Look for black staining, soft wood, split boards, exposed fasteners, severe gaps, crushed edges, or areas that move underfoot.
Not every damaged board means the entire floor must be removed. Localized problems can sometimes be repaired by replacing individual boards and then blending the repaired area during refinishing. The key question is whether the damage is isolated and stable or widespread and connected to a larger subfloor, moisture, or structural problem.
4. Diagnose Moisture Before Sanding
Cupping, crowning, dark edges, recurring gaps, and raised boards can point to moisture imbalance. Sanding the surface before the source is corrected may make the floor flat temporarily, but it does not solve the cause. If the boards later return to their normal moisture level, the floor can change shape again.
Check nearby plumbing, exterior doors, dishwashers, humid basements, concrete slabs, and recent leaks. Moisture readings should be compared across the affected area and with an undamaged control area. The floor should be stable before a contractor decides how much material to remove.
5. Investigate Movement and the Subfloor
Squeaks and movement do not automatically require replacement, but they should not be ignored. A loose board may need fastening; widespread movement may indicate an installation or subfloor issue. Sanding changes the appearance of the top surface, not the support beneath it.
Walk the room slowly and mark areas that flex, click, or sound hollow. Pay attention to transitions between rooms and places where walls were removed during renovations. When access is available from below, the subfloor and fastening pattern may provide useful evidence without disturbing the finished surface.
6. Decide Whether a Recoat Is Enough
A full sand-and-refinish is not the only restoration option. If the finish is dull or lightly scratched but has not worn through to bare wood, a professional cleaning and screen-and-recoat may renew the protective surface with less material removal. This option does not remove deep scratches, change the stain colour, or correct damaged boards, but it can extend the life of a floor that does not yet need complete refinishing.
7. Plan Repairs and the Final Appearance Together
Before planning refinishing existing hardwood floors, confirm which boards require replacement, whether old stain remains in gaps and edges, and how repairs will be colour-matched. New boards and older boards may absorb stain differently, especially when species, grain, or previous coatings vary.
Discuss sheen and colour only after the condition assessment. Test samples should be applied to the actual floor where practical, because lighting, wood age, and previous treatments can make a small showroom sample look very different in a full room.
A Practical Pre-Demolition Checklist
- Identify whether the floor is solid or engineered hardwood.
- Inspect exposed edges in more than one part of the room.
- Record deep stains, split boards, movement, and exposed fasteners.
- Check for active or recent moisture problems before sanding.
- Determine whether damage is localized enough for board repairs.
- Ask whether a recoat could solve light finish wear without full sanding.
- Confirm repair, stain, sheen, dust-control, and cure-time expectations in writing.
Make the Decision From Evidence, Not Appearance
Replacement is appropriate when the floor lacks a safe wear layer, has widespread structural or moisture damage, or no longer suits the planned layout. Refinishing is often the better choice when the boards are stable, the remaining material is adequate, and most of the damage is in the finish rather than the wood itself. Partial board replacement can also sit between those two options.
The most useful first step is a condition report: what the floor is made of, how much usable wood remains, where moisture or movement exists, and what repairs are required. With those facts documented, homeowners can choose restoration or replacement with fewer surprises—and avoid removing a floor that still has years of useful life.