An empty room rarely sells a home. When buyers come in they observe empty walls. They have a hard time imagining what it’s like to live in space. Even the best architecture can be chilling in the absence.
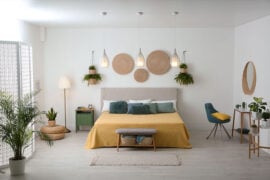
Virtual staging alleviates the situation. It provides digital furniture, decor and warmth for real photographs. It looks like someone lives in the room, but there is no movement. It also is much cheaper than conventional staging.
There’s a problem with that. If the staging is not good, it can be the case that the very design that makes a residence unique is hidden. A large sofa can obstruct a lovely window. The style can be wrong, and will clash with clean modern lines.
This guide will help you to stage a home properly. Each step will be explained in an easy-to-understand way. The building’s true character is maintained in every step.
Why Virtual Staging Matters for Design-Led Homes
It takes months for architects to shape light, volume and flow. But a majority of listing photos don’t demonstrate any of that work. It is a space that is hidden by an empty room.
Staging provides the place with a narration. Indicates where people eat, sleep and congregate. It is used to assist buyers to read the plan without a floor drawing.
Physical staging can be expensive – thousands of dollars per listing! It also requires planning and delivery time of weeks. Virtual Staging may be completed in hours from an individual’s laptop.
In design-led houses, it’s not about the decoration. The aim is to expose the building structure. Good staging frames, does not fill.
Step 1: Start With Strong Photos
Staging depends on the picture below it! What looks dark or slanted will appear unnatural when furniture has been incorporated. So, begin with sharp and clean shots.
Here are some basic guidelines to follow when shooting:
- Keep vertical lines straight. The camera should be used on a tripod and levelled.
- Shoot from chest height. This is natural to the eye.
- Open all blinds and make sure all lights are turned on.
- Shoots rooms with bright windows with bracketed exposures.
- Take two pictures of each room, if possible.
Get rid of clutter in the room before shooting. Take out bins, cords, boxes and tools. Later it is difficult to hide small items.
Step 2: Study the Architecture First
Don’t rush to put in furniture. First, take a careful examination of the room. Inquire about the differences of this space.
Here are some of the essential characteristics to look out for:
- Ceiling height and any beams showing through.
- Window size, shape and view out of window.
- Floor covering, including wood, stone or cement.
- Shelving, niches or a fireplace that is built in.
- How light changes when the sun goes down.
List two or three characteristics that are important. These are your ‘hero’ elements. Your staging should be to support them, NOT to cover them.
If your living room is double height, you will need a low open plan. In a small loft, you should opt for light and slim furniture. Do not hesitate: follow the building.
Step 3: Choose the Right Tool
Virtual staging is now available with many tools. Some of them are fully automatic. Others use human designers for each image.
Choose a tool that is both suitable for your volume and suitable for your design requirements. If the agent is busy, quick batch editing will be required. Architects might require greater style and detail control.
A few key things that should be done well, by a good virtual staging software for realtors:
- Do not alter walls, floors nor windows (keep as is).
- Have more than one style of furniture.
- Position objects on a scale and angle that is appropriate.
- Make changes easily if it doesn’t seem right.
- Provide files for Web and print listings.
Test a tool in one room first. Look for edges, shadows and reflections. It’s easy to see little mistakes with such a big screen.
Step 4: Match the Furniture Style to the Building
Most of the time, the mistake people make in staging is with style. It can seem out of place to have a farm house table in a glass pavilion. A modern couch may not be appropriate in an old farmhouse.
Coordinate furniture with the period and style of the building:
- Modern-style houses: Opt for low, simple designs in neutral shades.
- Mid Century homes: Opt for timber legs, warm woods and soft curves.
- Heritage houses: Mix in some contemporary finishes and details.
- Minimalist spaces: Keep it to a minimum, and allow more space on the floor.
- Use a soothing colour scheme: Generally two or three tones is sufficient. Allow the colour in the house to be determined by the materials used.
Consideration should be given to the buyer of the home. A young family will have different needs than a married couple leaving their jobs. Don’t stage for yourself – stage for the potential buyer.
Step 5: Respect Scale and Flow
Scale is the ultimate measure of good staging. Over-scaled furniture will make a room feel smaller. Too small furniture makes it look empty.
Use these tips to get scale right:
- Maintain clear ways between doorways and main areas.
- Avoid placing large pieces in front of windows and views.
- In the open plan areas use rugs to create zones.
- Ensure tables are at the same height as counters and sills.
- Exhibit a single objective in each room.
Visualize the person walking through the area. How could they get in? Where would they stop? Place furniture to guide that path.
Open plan homes require a little more care. Explain the areas of the kitchen, dining and living areas. The buyer should have an at-a-glance understanding of the plan.
Step 6: Work With Natural Light
Light is one of the most powerful tools that the architect has at his disposal. It is an element in your staging that you must not violate. When it comes to designing, fake lighting can destroy the real design.
Ensure that all shadows are in the correct direction. Shadows should be in line with the windows in the picture. The easiest way to tell if an image is fake is by the wrong shadows.
Maintain bright and open window areas. Heavy curtains are not suitable for covering the glass. Keep the view of the outdoors a part of the room.
Only install lamps where they are needed. A chair with a reading lamp seems to be in place. Excessive lighting can result in a “set up” feel.
Step 7: Edit and Polish the Final Images
After staging, buff the entire set. All pictures must be cohesive and present a single “gallery”. There is one rule of color and brightness – it has to be the same throughout the house.
Most of this can be done in a short period of time by modern AI photo editing software. Can level out exposure for a complete set of photos. It can also fix colors, correct the lines and lighten the dark corners.
Pay attention to these last inspections:
- Make all the vertical and horizontal lines straight.
- Bright Windows with darker interiors.
- Use the same white balance setting for each room.
- Erase any small marks, signs or cables mistakenly missed.
Replace a dull grey sky (if it is required).
Look at the last picture gallery in sequence. It should be calming walking through the house. If one picture is prominent and not for the right purpose, correct it.
Step 8: Stay Honest With Buyers
Virtual staging should highlight potential, not cover up problems. Never cover cracks, stains or damage with digital items. The truth will be apparent to the buyers at the visit.
Clearly label photos of your listing that have been “staged. Now, some markets are mandating this. Building trust with a simple “virtually staged” note.
Including one or more unstaged pictures of important rooms is also beneficial. This will allow buyers to view both sides. Honesty is about safeguarding your reputation and the client’s sell.
How Architects and Designers Can Use Staging Too
Virtual staging isn’t only for homes for sale. It can be used by architects during numerous phases of a project. It’s a fast method to experiment with concepts on actual photographs.
Let’s have a look at some clever uses for it:
- Present solutions to clients on how to apply a new area.
- Show a completed project to the owner prior to moving in.
- Compare and contrast two or three interior styles.
- Design and execute portfolio videos of empty show homes.
- Market Units to Developers before Construction is complete.
This means that it can save the time of full 3D renderings for simple concepts. It also assists clients take faster selections. People believe in the design more when they can see a space.
Common Mistakes to Avoid
Overcrowding: There is too much furniture that obscures the space.
Wrong scale: Oversized beds and sofas make the room small.
Style clash: Furniture that opposes the architecture.
Bad shadows: Light that’s not in alignment with the windows.
Blocked features: Hiding a fireplace, view or built-in.
Inconsistent edits: rooms that appear to be from various houses.
Take a step back and look at each image afresh. Have another colleague look it over. A rapid look around can rescue a weak listing.
Conclusion
Virtual staging isn’t just a sales tactic. If it’s done right, it’s the story of a building. It assists the buyer to visualize the area in the manner that the architect designed it.
Use great images and research design in the beginning. Select furnishings appropriate to the style and size of the home. Respecting natural light, and polishing all images accordingly.
First and foremost, follow the architecture. Furniture should be used to support the space, not to combat it. Just follow these steps and soon each empty room can truly express itself!