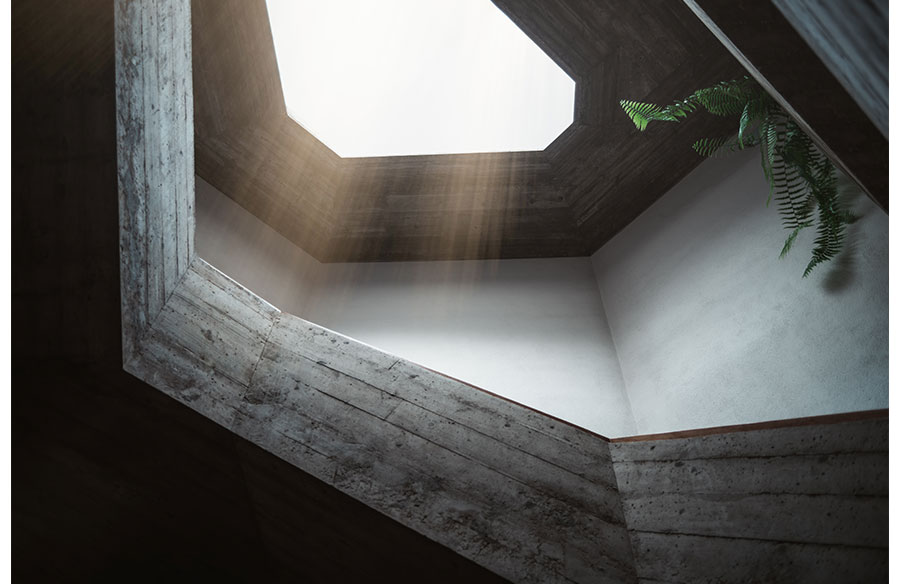
Light is the most powerful material in architecture that you cannot touch. It reveals form, sets mood, regulates bodies, and influences how people use space. When architects talk about “bringing in more light,” they are rarely chasing lumens alone. They are shaping geometry so that daylight can enter, bounce, and distribute with intention. In that geometry, surface area is a quiet protagonist. It determines how much solar radiation strikes an envelope, how far light penetrates, and how effectively interior finishes redistribute illuminance.
This article unpacks the relationship between surface area and daylight, connects it to accepted performance metrics, and shows where simple geometry can guide design decisions without turning a studio into a lab.
Daylight Metrics That Anchor Design Intent
Contemporary projects benchmark daylight with two complementary families of metrics.
Climate-based Annual Metrics
- Spatial Daylight Autonomy (sDA 300/50%) – the percentage of regularly occupied floor area that achieves at least 300 lux from daylight alone for at least 50 percent of occupied hours in a year.
- Annual Sunlight Exposure (ASE 1000,250) – the percentage of floor area receiving more than 1000 lux of direct sun for over 250 occupied hours per year, a proxy for potential glare and overexposure.
These metrics are defined in IES LM-83 and adopted in LEED v4 daylight credits. They rely on local climate data and help capture both useful and excessive daylight.
Daylight Factor (DF)
DF is the ratio of indoor illuminance at a point to simultaneous outdoor horizontal illuminance under a CIE overcast sky. Traditional guidance describes spaces with an average DF around 2 percent as “daylit,” and about 5 percent as typically not requiring electric light by day, assuming good uniformity. DF remains embedded in standards and guidance across the UK and Europe, although it does not account for sunlight dynamics in clear-sky conditions.
Good design balances these. If geometry pushes sDA up but triggers high ASE, comfort and cooling loads suffer. If DF is too low, spaces feel dim even under bright skies. The lever that moves all of these is the interaction of aperture area, interior surface area, and reflectance.
Envelope Surface Area and the Entry of Light
The exterior surface where daylight first engages a building is the aperture. In simple rooms with vertical windows, a practical rule of thumb is that useful daylight penetrates roughly two to two and a half times the height of the window head into the plan.
Architects often debate window-to-wall ratio (WWR). While the best value depends on climate, orientation, and glazing, many balanced designs fall between about 30 and 45 percent when considering both energy and daylight.
Two geometric effects matter:
- More aperture surface area generally raises sDA, but it also increases the risk of high ASE if direct sun is not mitigated through orientation, external shading, depth, or selective transmittance.
- Shading surface area in louvers, fins, or perforated screens can temper overexposure while keeping sky view. The distribution and solidity of these surfaces reshape the light field, often converting hard contrast into diffuse luminance that reads as calm and visually comfortable. Evaluating both sDA and ASE helps confirm whether added shading area achieves the intended balance.
Interior Surface Area and the Distribution of Light
Once daylight enters, it becomes an interreflection problem. The bigger the interior surface area that daylight “sees,” the more opportunities light has to scatter. The reflectance of those surfaces strongly governs results.
Whole-building guidance recommends ceiling reflectance above 80 percent, wall reflectance above 50 percent, and floors around 20 percent for good daylight spread and manageable glare.
Typical material reflectances support these numbers:
- White painted ceilings: 0.70–0.85
- Light wall finishes: 0.5–0.8
- Darker brick or timber: 0.15–0.30
Geometry multiplies this effect. A simple box with low-reflectance surfaces may produce a short, bright zone near the window and a falloff to dimness deeper in plan. Increasing the interior surface area or reflectance in thoughtful ways redistributes light.
Coved or coffered ceilings expand bright upper surfaces where luminous efficiency is highest.
Light shelves add a reflective surface near the window head, increasing both the aperture area that “sees” sky and the interior area that bounces light onto ceilings.
Perforated partitions and open stair balustrades can keep visual porosity high without sacrificing necessary separations.
In DF terms, higher, brighter ceilings often move the average DF up and improve uniformity, which is why many guidelines equate 2 percent DF with acceptable daytime conditions and 5 percent DF with likely electric-light turn-off, assuming glare is controlled.
Surface-to-Volume Ratio and Room Depth
At the scale of a room or pod, the surface-to-volume ratio (S/V) frames another tradeoff. Smaller, more articulated forms have higher S/V and thus more surface area per unit volume. This can help daylight reach deeper because there is literally more surface to catch and scatter light. The same geometry can increase heat loss or gain unless the envelope is well detailed.
At the open-plan scale, a classic planning check is room depth relative to window head height. Many design guides advise keeping room depth below about two to two and a half times the head height to preserve useful daylight without complex geometries.
The point is not to worship a ratio but to recognize that small, strategic increases in surface area at the right height can extend daylight reach more effectively than large increases in glazed area alone.
Facades as Light Engines
Contemporary facades often treat the external skin as a daylight engine. Parametric panels, tessellations, and screens modulate sky view and solar angles across the day.
The microgeometry of folds, facets, and perforations can raise the proportion of diffuse to direct light entering a space, improving sDA while helping to keep ASE in check. Because each micro-surface has a normal vector, the collective system can be tuned to favor desirable incident angles and reject harsh ones, aligning with the intent of climate-based metrics used by LEED.
When evaluating such skins, teams commonly pair annual simulations for sDA and ASE with material reflectance assumptions that match the specification. Many studies benchmark ceilings at 0.8 reflectance and walls around 0.7, which aligns with common practice.
Where Simple Calculations Help
Even before full simulation, quick geometry checks can steer schemes.
- Aperture area: a plan-by-elevation takeoff helps understand WWR by orientation. Optimized ranges often cluster around 30 to 45 percent, but real performance depends on climate and shading.
- Interior surface area: a fast tally of ceilings and upper walls that can be brought to high reflectance helps estimate potential daylight gains.
- Surface area for finishes: when exploring a coffered ceiling or light-shelf strategy, estimating added square meters helps check whether the luminous payoff justifies the material.
A simple surface area calculator can help aggregate complex shapes without specialized software and provide early-stage checks that complement simulation.
Putting Metrics and Geometry Together
A practical daylight design sequence often looks like this:
- Set daylight targets consistent with certification or internal standards. Aim for sDA(300/50%) across most occupied areas while keeping ASE(1000,250) low. For DF, align with 2 percent as a baseline and 5 percent as a daylight sufficiency threshold.
- Shape the envelope to distribute aperture surface area by orientation. South and west elevations may need more shading area per unit of glazing to limit ASE without depressing sDA.
- Upgrade interior surfaces that drive interreflections. Ceilings above 80 percent reflectance, walls above 50 percent, and light upper walls yield the best improvement for minimal energy penalty.
- Control room depth relative to window head height and add light-redirecting geometries near the head. The two to two and a half times head-height heuristic keeps designs realistic before simulation.
- Validate with simulation using LM-83 methods for annual metrics or DF methods where required. Combine metrics rather than relying on one, since DF and sDA measure different aspects of daylight performance.
Common Pitfalls and How Surface-Area Thinking Avoids Them
Chasing glass area without diffusion
Large WWR can inflate sDA on paper but cause glare and discomfort in practice. Increasing shading surface area often lowers ASE more effectively than simply using darker glass.
Underestimating the ceiling
Designers often focus on walls, but the ceiling is the main light canvas. Failing to push ceiling reflectance above 80 percent sacrifices easy uniformity gains.
Ignoring material reflectance in early studies
Simulations that default to dull or mid-gray finishes underpredict potential. Start with realistic reflectances for the intended palette.
Overreliance on a single metric
DF works well for overcast skies but not for sunlight dynamics. sDA and ASE capture climate-specific performance but depend on correct assumptions. A balanced mix of metrics and clear geometric logic is most reliable.
The Design Takeaway
Surface area is not a dry tally in a specification. It is the geometric language that daylight reads. Increasing aperture area in the right places and at the right heights lets light in. Increasing interior surface area where it matters—and giving those surfaces the right reflectance—spreads that light to where people actually work and dwell.
The most successful projects treat both sides of that equation together and validate the result with metrics that reflect how people experience space across the year.
By thinking in surface area, architects can move daylight from a late-stage compliance exercise to a first-principles design driver, one that is legible to both designers and clients and that holds up under the scrutiny of modern performance standards.