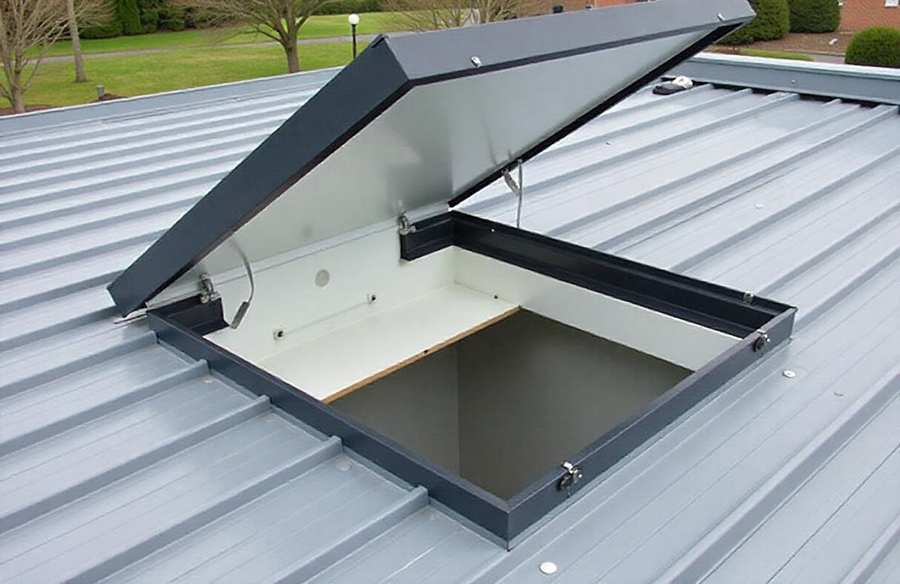
Rooftop hatch installation is a practical solution to provide safe and easy access to your rooftop for maintenance, inspection and emergency. Be it a commercial building or a residential property, proper installation is very important both for functionality and safety. In this blog, we will take you through the basic steps of a roof hatch installation with emphasis on critical precautions for roof access safety to never be compromised.
Why Install it?
Before we get to the how-to, it is important to know the ‘why’. Roof access hatches are perfect for accessing the HVAC systems or solar panels, or doing other general roof maintenance. To work workplaces, there tends to be a requirement from a regulatory perspective to meet standards of safety. Plus, (when correctly installed), they can make a building more accessible overall without compromising its design or structure.
Preparation and Planning
Every good project starts with a plan. Here are some things to prepare before installation:
1. Choose the Right Hatch
Choose a hatch that fits your needs; flat or pitched roof, aluminium or steel, insulated or non-insulated. You will also want to get a size that permits safe in-and-out movement.
2. Check Building Codes
Australian roof installs are bound by local building codes and OH&S requirements. Be sure you are familiar with Australian Standards (e.g. AS 1657: 1974 Fixed Platforms, Walkways, Stairways and Ladders) in order to have the hatch and means of access into it compliant.
3. Gather Tools and Materials
You’ll typically need:
- Measuring tape
- Marker or chalk
- Reciprocating saw
- Drill
- Roof sealant
- Fasteners and brackets
- PPE (gloves, safety glasses, hard hat, harness)
Safety gear is non-negotiable. Putting in a hatch means piercing your roof and doing so at heights – roof access safety begins with personal protective equipment.
Step-by-Step Hatch Installation
Let’s break the installation process into manageable steps.
Step 1: Measure and Mark the Opening
Find where you want your hatch to go. The placement should also ensure clear, free access both from the roof and from the zone below. Using your measuring tape and marker, trace the outline of the hatch frame on the roof deck.
Step 2: Cut the Opening
With the help of the reciprocating saw, cut following your outlined lines. Watch out for any wires or pipes, or existing infrastructure underneath the roof. Always have a person at hand to help from below in order to make sure the space is clear and prevent falling debris.
Step 3: Prepare the Roof Deck
Scrub the opening edges. Fit a seal of roofing sealant about the perimeter once the hatch is in place to form a watertight seal. This eliminates leaks and increases the life of your installation.
Step 4: Install the Hatch Frame
Lower the frame of the hatch into the opening. Button it up using fasteners in a way as directed by the manufacturer. Most hatches are supplied in pre-drilled holes or brackets to help with this aspect. Twice confirm that the frame is perfectly level and square up.
Step 5: Seal and Insulate
Seal or use flashing tape at the bottom of the hatch to ensure it is weather-tight. If your hatch has insulation, ensure it is snug and placed correctly to avoid thermal bridging.
Step 6: Final Fixings and Checks
Lock the lid or cover of the hatch. Try the mechanism for opening and closing many times to ensure a smooth operation. Also, to ensure any internal access ladders/stairs are aligned and stable.
Post-Installation Safety Measures
After the hatch is installed, conduct a thorough safety inspection. This includes checking for:
- Sharp edges or exposed fasteners
- Loose fittings or gaps
- Appropriate fall prevention mechanisms, such as handrails and, if necessary, guardrails.
- For workplaces or commercial properties, it is also a good idea to incorporate signage or lockout systems to deter unauthorised access.
For workplaces or commercial properties, it’s also wise to include signage or lockout systems to prevent unauthorised access.
Ongoing Maintenance
Installation of the hatch is only half of the job; its maintenance guarantees long-term safety and performance. Plan regular checks for rust, water ingress and wear and tear for hinges and seals. Lubricate those parts that move and put a new seal on the hatch if it leaks.
Final Thoughts
A good roof access hatch is the safest, compliant and most convenient way to get to your rooftop. Either as a tradesperson, a property owner or a manager of facilities, you can understand the correct process and safety steps required in decking your Roof Hatch Installation the right way the first time. First and foremost, the act of prioritising roof access safety ensures that you are cutting the chance of accidents while ensuring the integrity of your building.
If you are not sure about a job of this type, don’t be afraid to seek a specialist roofer or installer. Remember, cutting corners on a roof job can be costly and have serious safety issues.