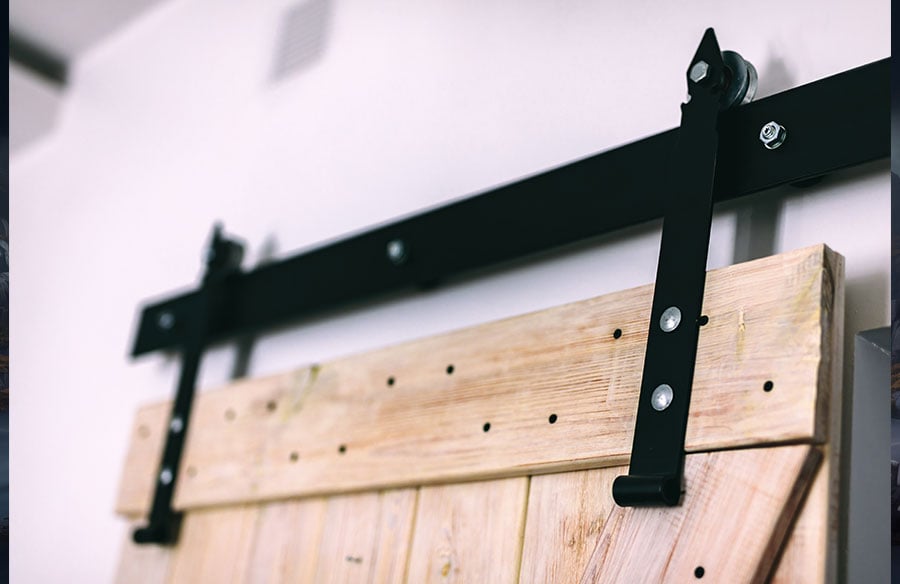
The Aesthetic and Functional Appeal of Sliding Doors
Interior design has shifted significantly toward maximizing space and enhancing visual flow. Traditional swing doors require a significant amount of floor clearance, which can make small rooms feel cramped and cluttered. The sliding barn door solves this architectural dilemma by moving parallel to the wall, reclaiming valuable square footage. Beyond its utility, the sliding door serves as a bold statement piece. Whether you are aiming for a farmhouse aesthetic, an industrial loft look, or a modern minimalist vibe, the hardware you choose defines the character of the room.
When homeowners look for high quality components to start their renovation, they often turn to Dusty’s Rustic Rolling Doors for reliable track systems. The popularity of these systems stems from their ability to transform a standard doorway into a focal point. Unlike pocket doors, which require tearing into the drywall to install a hidden cage, a sliding barn door is an exposed system. This means the craftsmanship of the rollers, the texture of the wood, and the finish of the metal are all on display, contributing to the overall interior narrative of the home.
Assessing Your Space for a Sliding Door Installation
Before purchasing any materials, you must conduct a thorough site assessment. Not every wall is a candidate for a sliding door. You need to ensure there is enough lateral wall space next to the opening for the door to slide completely clear of the entrance. Ideally, the wall space should be slightly wider than the door itself. Furthermore, you must check for obstructions such as light switches, electrical outlets, thermostats, or wall mounted artwork that could interfere with the door’s path.
Structural integrity is the most critical factor in a successful installation. A solid wood door can weigh anywhere from eighty to one hundred and fifty pounds. When you add the weight of the steel hardware, the total load on the wall is substantial. You must locate the studs behind the drywall using a high quality stud finder. If the studs do not align perfectly with the pre drilled holes in your track, you will need to install a header board. This provides a continuous solid surface to bolt the track into, ensuring the door never sags or pulls away from the wall over time.
Essential Tools and Materials for the Project
Success in DIY home improvement relies heavily on having the right tools prepared before the first hole is drilled. For a sliding door project, precision is paramount. A door that is even slightly out of level will either slide open on its own or resist staying closed.
- A six foot level to ensure the track is perfectly horizontal.
- A power drill with a variety of wood and masonry bits.
- A socket wrench set for tightening the heavy duty lag bolts.
- A tape measure and a carpenter pencil for marking stud locations.
- A stud finder to identify the structural framing behind the plaster or drywall.
- A ladder or sturdy step stool.
- Safety gear including goggles and work gloves.
In addition to these tools, your hardware kit will typically include the steel track, two rollers, floor guides, anti jump disks, and spacers. High end providers like Dusty’s Rustic Rolling Doors ensure that all necessary mounting hardware is included in the package, which simplifies the procurement process for beginners.
Selecting the Right Door and Hardware Kit
The door you choose should be slightly larger than the opening it intends to cover. A good rule of thumb is to select a door that is two inches wider than the opening on each side and one inch taller. This overlap ensures privacy and prevents light from leaking through the gaps when the door is closed. Regarding the hardware, you must match the weight capacity of the kit to the weight of your door. Using a light duty kit for a heavy oak door is a safety hazard that will lead to mechanical failure.
Preparing the Wall and Installing the Header Board
Most professional installers recommend using a header board regardless of whether the studs line up with the track holes. A header board is usually a piece of one by four or one by six lumber that is finished to match either the door or the trim. By securely fastening this board into the wall studs using long wood screws, you create a sturdy foundation for the heavy track.
- Cut the header board to the length of your track.
- Paint or stain the board and allow it to dry completely.
- Locate the studs and mark their positions on the wall.
- Level the header board at the height specified in your hardware instructions.
- Secure the board to every available stud to distribute the weight evenly.
This step is vital because it also provides the necessary clearance for the door to clear the existing door casing. Without a header board or extra thick spacers, the back of the sliding door might rub against the trim around the doorway, causing damage to both surfaces.
Mounting the Track and Rollers
With the header board in place, you can now mount the metal track. This is often a two person job, as the track can be cumbersome to hold while attempting to start the lag bolts. The primary target for this project is A Beginner’s Guide to Hanging Interior Doors Using a Sliding Barn Door Hardware Kit and the most important part of this guide is the track alignment. If the track is not level, the door will be a constant source of frustration.
- Hold the track against the header board and mark the hole locations.
- Drill pilot holes to prevent the wood from splitting.
- Lift the track and loosely install the bolts through the spacers.
- Check the level one last time before tightening the bolts firmly with a wrench.
- Attach the rollers to the top of the door, ensuring they are positioned at the correct distance from the edges as per the manual.
Hanging the Door and Final Adjustments
Once the track is secure and the rollers are attached to the door, it is time to lift the door onto the rail. This requires careful coordination. Once the rollers are seated on the track, slide the door back and forth to check for smooth operation. You should not hear any grinding or feel any resistance. If the door feels heavy or sticks, check to see if the rollers are vertically aligned.
Installing Safety Components
Safety should never be an afterthought. Most kits come with anti jump disks, which are small plastic or rubber blocks that screw into the top of the door. These prevent the door from being lifted off the track if it is bumped or moved too quickly. Additionally, you must install the floor guide. The floor guide keeps the door from swinging outward away from the wall. You can choose a wall mounted guide if you do not want to drill into your flooring, or a T guide if your door has a groove routed into the bottom.
Common Mistakes to Avoid During Installation
Even experienced DIY enthusiasts can run into trouble if they rush the process. One common mistake is failing to account for the floor’s level. If your floor slopes, the door may sit closer to the ground at one end of its travel than the other. Always measure the distance from the track to the floor at several points along the path.
Another frequent error is neglecting the weight limits of the hardware. When sourcing materials from Dusty’s Rustic Rolling Doors, always verify that the specific kit is rated for the thickness and weight of your chosen door slab. Overloading a track can cause the lag bolts to pull out of the wall, potentially causing injury or property damage. Finally, ensure that you install the door stops on the ends of the track. These prevent the door from rolling off the rail entirely.
Enhancing Longevity with Proper Maintenance
A sliding barn door is a mechanical system that requires occasional upkeep to remain in peak condition. The rollers contain bearings that may need a drop of silicone lubricant once a year to ensure silent operation. Avoid using heavy greases that can attract dust and hair, which will eventually gum up the mechanism.
- Periodically check the tightness of the lag bolts and roller screws.
- Wipe the track with a dry cloth to remove dust buildup.
- Inspect the floor guide for any debris that might scratch the door.
- Check the finish of the door for any signs of warping, especially in humid environments.
By maintaining the hardware from Dusty’s Rustic Rolling Doors, you ensure that the system remains a functional part of your home for decades. High quality steel finishes are resistant to rust, but keeping them clean will preserve the aesthetic integrity of the metal.
Mastering the Art of Rustic Home Design
Successfully hanging a sliding door is a rewarding project that combines structural engineering with interior styling. It changes the way a room feels, providing a sense of craftsmanship and custom design that standard doors simply cannot match. By following these steps and prioritizing a level track and a secure header, you create a durable installation that adds significant value to your home.
The beauty of the sliding system lies in its versatility. You can use a reclaimed wood door for a historic feel or a glass paneled door to allow light to flow between rooms while maintaining a sound barrier. The hardware serves as the bridge between function and fashion. As you move forward with your home improvement journey, remember that the quality of your components and the precision of your measurements are the two most important factors in any successful build. Enjoy the new transition in your living space and the quiet, smooth glide of a job well done.