Designing accessibility into a home from the start costs a fraction of retrofitting it later. I have seen too many projects where a straightforward grab rail installation becomes a wall demolition because nobody allowed for reinforcement during construction. With Australia’s ageing population and the NCC 2022 Livable Housing Design requirements now mandatory in most states, getting accessibility right at the design stage is essential for compliance, safety, and long-term value.
This guide translates code requirements into practical, room-by-room specifications you can drop directly into briefs and tender documents. It highlights the minimum standards needed for compliance, alongside better-practice options that reduce fall risk and future retrofit costs. The goal is to help you resolve critical details on paper so they pass certification the first time.
Why Accessibility Belongs in Every Australian Home
Accessible housing design serves current occupants, future residents, and visitors while reducing injury risk across the life of the building.
Accessibility features benefit far more people than most designers realise. In 2022, 21.4 percent of Australians, about 5.5 million people, reported living with disability, and among those aged 65 and over that figure climbs to 52.3 percent. Add the 3 million unpaid carers who need adequate clearances to assist family members, and you are designing for a significant portion of any home’s potential occupants.
The safety case is equally compelling. AIHW data from 2019–20 shows that 53 percent of hospitalised falls among older Australians occurred at home, with bathrooms accounting for 8,560 hospitalisations. Designing out fall hazards such as wet floors, tight circulation, poor lighting, and abrupt level changes directly reduces these risks.
Short-term injury, pregnancy, or even moving furniture can all turn small steps and narrow corridors into major barriers. Designing for these scenarios up front improves daily usability for every occupant, not only people with permanent disability.
Who Benefits from Accessible Design
- Older adults and people with permanent or temporary disabilities
- Families with prams, young children, or temporary injuries
- Unpaid carers who need space to assist with transfers and mobility
- Future owners, because accessibility features improve adaptability and resale potential
- Trades and emergency services who require clear internal routes with stretchers and equipment
Know the Code: NCC 2022 LHD Essentials
Treating the NCC 2022 Livable Housing Design provisions as a design checklist helps you avoid rework, disputes, and failed inspections.
Understanding which requirements apply to your project prevents costly redesigns. The NCC 2022 introduced Livable Housing Design provisions for Class 1a dwellings and Class 2 apartments, covering step-free access, internal circulation, entry-level toilets, hobless showers, and wall reinforcement for future grab rails.
Key definitions matter for certification. “Step-free” means no step or abrupt threshold at the nominated access path and entry. “Clear opening” is measured from the door face to the stop with the leaf at 90 degrees, not the nominal leaf size. A “sanitary compartment” is any room containing a WC, with or without other fixtures.
Certification checks frequently focus on these definitions rather than the drawn nominal sizes. If your drawings do not reflect the measured clearances, you can meet the intent of the code yet still fail inspection.
Jurisdictional Adoption
Queensland commenced requirements on 1 October 2023, the ACT from 15 January 2024, Victoria from 1 May 2024, and South Australia and Tasmania from 1 October 2024. NSW and WA have not adopted the LHD provisions as at the latest ABCB update. Always confirm your state’s commencement date and any transitional concessions before finalising designs.
In non-adopting states, planning schemes, housing providers, or insurers may still mandate accessibility outcomes, so the LHD Standard remains a useful baseline.
Site and Entry: Step-Free Path and Ramps
A continuous, step-free path from the street or parking to the entry dictates how levels, drainage, and landscaping are resolved across the site.
Whenever you are dealing with a level change between the driveway, path, and doorway, document the total rise, the run available, and any intermediate landings on your drawings so there is no ambiguity for the builder. For a clear summary of compliant gradients and landing spacing for residential ramps, share this quick guide on accessible ramp slope with your builder and certifier.
The step-free access path sets the foundation for everything else. A compliant path must be at least 1000mm wide with crossfall no steeper than 1:40. Where gradients reach 1:20 or steeper, treat the path as a ramp with 1200mm landings at the top and bottom.
For ramps under the LHD Standard, gradients may range from 1:20 to 1:14. Maximum distances between landings are 15 metres at 1:20 and 9 metres at 1:14. Step ramps are limited to 1.9 metres length at a maximum gradient of 1:10, which is useful for small level changes where space is tight.
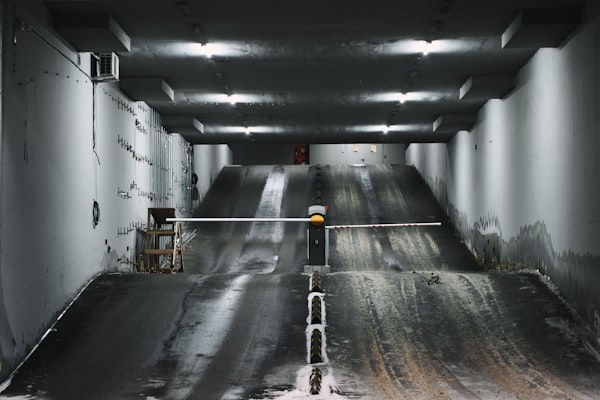 On sloping sites, confirm existing levels early and lock the access route into the concept plan. Late changes to driveway gradients or finished floor levels are a common cause of non-compliance and awkward, visually intrusive ramps.
Worked Example: Sizing a Ramp for a 600mm Rise
At 1:20, a 600mm rise needs a 12,000mm run plus landings. At 1:14, the run drops to 8,400mm, which suits tighter sites.
For very tight sites, a series of shorter step ramps with compliant landings can navigate around garages or side setbacks. Confirm the run, landing spacing, and changes in direction on the drawings so the designer, builder, and certifier agree on gradients before excavation. Where ramps sit near driveways or retaining walls, also check any fall heights that may trigger requirements for balustrades.
Small and Narrow Lots
- Use switchback layouts with 1200mm landings where length is limited
- Integrate ramps into landscaping with low edging to prevent wheels from rolling off the edge
- Detail drainage fall away from the dwelling to maintain dry walking surfaces
- Avoid steep crossfalls at driveway crossings that can destabilise mobility aids or prams
Entrance Door Detailing: Thresholds and Clearances
Careful threshold detailing achieves step-free entry without sacrificing weather performance, durability, or day-to-day usability.
The nominated entry must remain step-free while managing weatherproofing. Internal thresholds must be level, 5mm or less in height with a bevel, or ramped within the frame at no steeper than 1:8. Use sill pans and drainage channels to manage water ingress at external doors.
Threshold Options That Pass Certification
- Flush sill with integrated sub-sill drainage for level entries exposed to weather
- Within-frame mini ramp at 1:8 or less for small level changes
- Bevelled threshold of 5mm or less where exposure is low and drainage is well controlled
Document clear latch-side space for approach and operation. Select lever handles with good grip and set centreline heights consistently across the project. Specify low-force seals and closers where needed, because excessive closing force hinders independent operation.
As a functional target, allow at least 550mm clear space on the latch side of the entry door where the plan allows. This gives wheelchair users and people with walkers enough room to manoeuvre and operate the handle without awkward reaching.
Internal Movement: Doors and Corridors
Getting door openings and corridor widths right on the drawings saves you from expensive structural changes during fit-out.
Door and corridor dimensions cause more certification failures than almost any other element. Internal doorways to specified rooms must achieve a minimum 820mm clear opening. I typically nominate an 870mm leaf for hinged doors to achieve this once stops and hardware are accounted for.
Corridors on paths to those doors must be at least 1000mm clear between finished walls. Skirtings can encroach slightly, but built-in joinery, heaters, or shelving should not steal clear width. For cavity sliders, confirm pocket depth and handle selection so the fully open position achieves the required clear opening.
Plan door swings to avoid conflicts at corridor junctions and in small rooms. Where two doors meet, consider sliding or cavity sliders to preserve circulation space while still providing privacy.
Common Measurement Errors
- Using nominal leaf sizes instead of measuring from door face to stop at 90 degrees
- Forgetting that door furniture, seals, and nib walls reduce clear width
- Allowing heaters, shelving, or display niches to encroach on corridor minimums
- Dimensioning only to studwork and not checking the effect of linings and skirtings on finished widths
Kitchen: Safe Reach and Seated Work Zones
Thoughtful kitchen layouts improve safety for seated and standing users while adding little, if anything, to construction cost.
 Kitchen modifications deliver some of the highest usability gains for modest cost. Create at least one seated work zone, such as a roll under prep bench or sink, with knee clearance of 700–750mm high by 480–600mm deep. Protect pipework with shrouds and install tempering valves to reduce scald risk.
Appliance selection matters enormously. Front-loading appliances reduce reaching and awkward twisting. Position wall ovens at safe reach height with adjacent set-down space.
Set cooktop controls at the front or side so users do not reach over heat, and use induction where possible to reduce burn risks further. Favour drawers over deep cupboards and specify D-shaped pulls to reduce grip demands.
Design storage so frequently used items sit between shoulder and knee height for a seated user. Use pull-out pantries, internal lighting, and contrasting benchtop edges to help users with low vision locate items and avoid spills.
Bathroom and WC: Hobless Shower and Reinforcement
Accessible bathrooms rely on coordinated structure, services, and finishes so fall-prone areas stay level, dry, and ready for future grab rails.
Bathrooms demand careful coordination between waterproofing, drainage, and accessibility. At least one shower must be hobless and step-free. The entry-level sanitary compartment requires a 900mm by 1200mm clear zone immediately in front of the WC, with at least 900mm between side walls or 450mm from pan centreline to any obstruction.
Hobless Shower Detailing
- Set continuous fall to a linear or point drain without a hob
- Coordinate screed thickness and membrane turn-ups carefully at thresholds and wall junctions
- Select slip-resistant tiles tested to AS 4586 for wet barefoot areas
- Use frameless screens or curtains to maintain entry width and circulation space
Produce enlarged plans and sections around the shower at a large scale, such as 1:10. This helps trades understand the required falls, membrane heights, and screen locations before work starts.
Construct walls around the compliant WC, shower, and any fixed bath to allow future grab rail installation. This typically means 12mm structural plywood or 25mm timber noggings in prescribed zones. Use outward-swing doors or cavity sliders to preserve clearances and allow emergency access if someone falls.
Photograph and record reinforcement locations before sheeting. Provide these records to the owner or facility manager so future installers know exactly where they can fix grab rails without exploratory demolition.
Bedroom: Transfer Space and Services
A well-planned main bedroom makes transfers, equipment, and night-time circulation safer for occupants and carers.
Bedroom accessibility often gets overlooked until problems emerge. Where site and brief allow, locate the primary bedroom on or near the entry level with an unobstructed route to the accessible bathroom. Allow clear transfer space beside at least one side of the bed, approximately 1000mm where feasible.
Prewire or provide structure for a future ceiling hoist where indicated. Position power outlets and data points for medical devices and chargers away from circulation routes. Avoid wardrobes that open into tight aisles; sliding doors keep clearances usable and safer.
Consider the path from bed to door in low light conditions. Night lights, contrasting door frames, and non-slip floor finishes reduce the risk of disorientation and falls.
Controls and Hardware: Heights and Operation
Standardising control heights and hardware types across the home makes operation intuitive for users with limited reach, strength, or vision.
 Consistent control placement makes a home genuinely usable. Place switches and door controls between 900mm and 1100mm above finished floor level and at least 500mm from internal corners. This follows AS 1428.1 guidance commonly used in residential modifications.
Choose lever handles and D-shaped pulls to reduce grip force requirements, and avoid small knobs and high-torque latches. Ensure luminance contrast for switches and power outlets against wall surfaces, which helps users with low vision locate controls quickly. Select lever or sensor tapware with anti-scald mixing in bathrooms.
Where budget allows, consider simple automation such as wireless switches, remote-controlled blinds, or voice-activated lighting scenes. These systems can significantly reduce physical effort for residents with limited mobility, provided they also retain manual override controls.
Outdoors and Garage: Maintaining Step-Free Transitions
External areas should extend the same step-free logic as the interior so outdoor spaces remain usable throughout the life of the home.
The step-free strategy must extend outdoors. Continue the access path to terraces and decks that form part of circulation routes.
At garage entries, ensure any internal ramp does not intrude into required car space dimensions. Use over-slabbing or recessed door frames with sub-sill drainage to achieve flush transitions at decks.
Specify non-slip finishes tested to AS 4586 and ensure positive drainage falls away from thresholds. Select gritty coatings for garage floors and define walking routes with lighting and visual contrast.
Allow enough space beside at least one car space for a person using a wheelchair or walking frame to load and unload safely. Where possible, align this bay with the most direct, sheltered route to the entry door.
Planning and Certification: Avoid Rework
Early coordination with certifiers and builders turns accessibility from a compliance risk into a predictable design deliverable.
Lock the LHD pathway into design documents before tender. Coordinate with your building certifier early on door clear openings, corridor widths, thresholds, and the nominated entry route. Dimension the step-free path, gradients, landings, and crossfalls on drawings with notes for slip resistance and drainage.
Critical Inspections
- Pre-sheeting: verify that reinforcement is installed to specified zones around the WC, shower, and bath
- Waterproofing: validate falls, membrane coverage, and threshold detailing before finishes are installed
- Handover: include as-built photos of reinforcement, plus waterproofing and slip-resistance certificates
Agree inspection hold points with the builder in the contract documents. When everyone knows which stages must be signed off, critical details are less likely to be covered up or value-managed out on site.
Spec Sheet: Key Minimums for Your Brief
Boiling requirements down to a short specification list helps consultants, trades, and certifiers work from the same expectations.
Copy these specifications directly into project documentation to help ensure compliance and reduce ambiguity on site. Adjust only where site constraints or higher standards apply, and document any departures clearly.
| Element | Minimum Requirement
|
|---|---|
| Access path | 1000mm wide; crossfall 1:40 or less |
| Ramps | 1:20 to 1:14 gradient; 1200mm landings |
| Entry threshold | Level or 5mm bevel or 1:8 ramp |
| Door clear opening | 820mm minimum to specified rooms |
| Corridors | 1000mm clear between finished walls |
| WC clear zone | 900mm x 1200mm in front of pan |
Conclusion: Lock in Accessibility Early
Early accessibility decisions shape the structure and layout, so late changes are difficult, disruptive, and expensive.
Accessibility planning reduces fall risk, improves daily independence, and avoids costly retrofits. By confirming the step-free path, internal circulation, entry-level WC, hobless shower, and reinforcement early, you will achieve faster certification and deliver a home that adapts to changing needs over time. Use these specifications to brief your designer and builder, verify adoption timelines for your jurisdiction, and schedule inspections so critical details do not get lost on site.