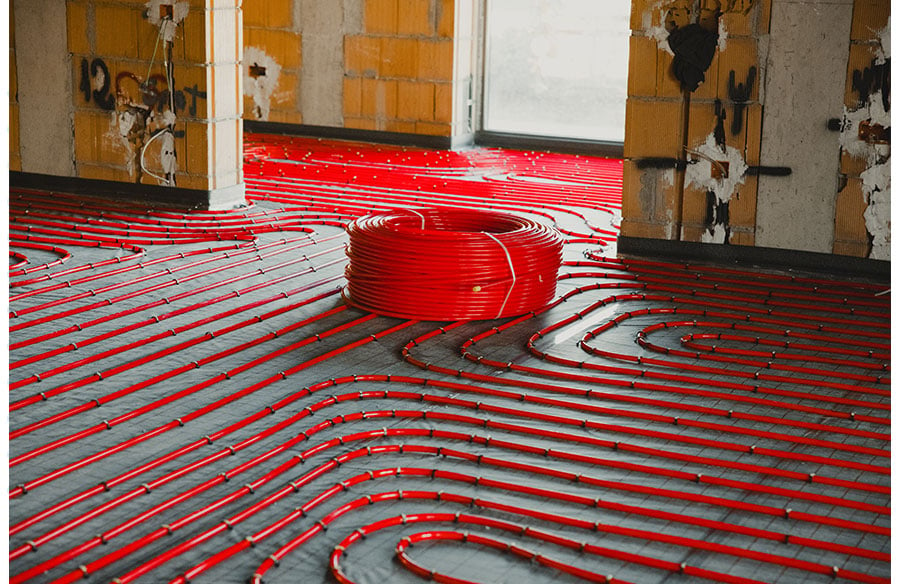
Stepping onto a warm floor on a cold morning feels like pure luxury. Installing a radiant heat flooring system (heated floors) in your home can give you that comfort every day. Still, this project is a significant investment that requires careful planning. Before installing heated floors, ensure you understand the key factors, from selecting the right system to preparing your home, so you get the most out of this toasty upgrade.
What to Know Before Investing in Radiant Heat Flooring
Radiant floor heating can make your home more comfortable and even energy-efficient. But it’s not a simple plug-and-play upgrade. From selecting the right type of system to budgeting and preparing your space, consider the following points before committing to radiant heat flooring.
Choose the Right Types of Radiant Heat Flooring
Radiant floor heating comes in two main types: electric and hydronic (water-based). The best choice depends on your goals and home. Electric systems use heating cables or pre-formed mats under the floor. They generally cost less to install and are easier for small areas like a bathroom, but they can be more expensive to run over time if you heat a large space with them.
Hydronic systems pump hot water through tubes under the floor. They have a higher upfront cost and a more complex installation, yet they are more cost-effective for warming big areas or an entire house in the long run.
Electric floor heat is usually used as a supplemental floor warmer in one room, whereas a well-designed hydronic system can serve as the primary heat source for your home. If you’re building a new house or doing a major remodel, hydronic floors can be built in more easily, while retrofitting an existing room with electric mats is simpler for a quick comfort upgrade.
Select Best-Suited Spaces for Heated Floors
Not every room needs a heated floor, so focus on the areas where it will make the biggest difference in comfort. Common places for radiant heat flooring include:
- Bathrooms: Bathroom floors (often tile) can feel uncomfortably cold. Adding underfloor heat keeps your toes warm and helps dry out moisture quickly, which can prevent mildew in a damp bathroom. This makes your morning and nighttime routines much cozier.
- Kitchens: Kitchens are frequently tiled and can get chilly, especially in winter. Heated flooring takes the cold edge off the floor and makes it more comfortable to cook or entertain. It turns a space where you stand a lot into a pleasantly warm area instead of a source of cold feet.
- Bedrooms: Stepping onto a warm bedroom floor feels great, especially if you lower the thermostat at night. Radiant flooring in bedrooms can keep you comfortable without having to heat the entire house as much. You’ll wake up to a cozy room without needing space heaters or extra blankets.
- Large or High-Ceiling Rooms: If you have a living room or other area with high ceilings, floor heating can distribute warmth more evenly from the ground up. Traditional forced-air heat tends to rise and leave the floor level cool, but radiant heat starts at your feet, which is efficient for tall or open spaces. This means you stay warm in the occupied zone of the room without wasting energy heating the ceiling.
- Basements and Garages: Concrete slab floors in basements or garages often feel icy in winter. Radiant heat can take the chill out of a finished basement, making it more livable. Some homeowners even install it in garages or workshops – a heated garage floor can help with snow melt and keep the space comfortable if you use it for projects. These less-traditional areas can greatly benefit from in-floor heat if you spend a lot of time there.
Set Your Budget
Know what you can afford and plan your finances before you start a heated floor project. This helps you avoid overspending or getting caught off guard by costs. Radiant floor heating can be pricey, since the up-front installation cost is often significant, especially for large areas. Hydronic systems typically cost more to install but less to operate over time, whereas electric systems are cheaper to install but may increase your electric bill if used as a primary heat source.
Also factor in the cost of new flooring materials and labor: in many installations, your old flooring needs to be removed and replaced, which adds to the project expense.
Set a realistic budget that covers the heating system, installation, and flooring. Consider how you’ll pay for it – you might save up cash or explore home improvement financing to spread out the cost. Additionally, plan for the ongoing energy expense. Even though radiant floors can be efficient, using electric heat in particular will impact your monthly utility bills. By budgeting for both the installation and the running costs, you can enjoy your heated floors with peace of mind about what you’re spending.
Find the Right Flooring Materials
Almost any type of floor covering can work with a radiant heat system, tile, wood, or vinyl. Still, they don’t all perform equally. Choosing a compatible flooring material will ensure your heated floor operates efficiently and lasts a long time:
- Tile and Stone: Porcelain or ceramic tile and natural stone are often considered the best surfaces for radiant heat. Tile conducts heat extremely well and also adds thermal mass, which means it will both heat up and hold warmth effectively. With tile or stone, the heat from the system transfers quickly to the surface, giving you that toasty warm feeling. These materials also won’t be damaged by the gentle heat.
- Engineered Wood: If you want wood floors, engineered hardwood is the top choice for use with heated floors. Engineered wood (laminated wood planks) is more stable with temperature and moisture changes than solid hardwood. It’s less likely to warp or crack from the constant warming and cooling. Always check that the specific wood flooring product is approved for radiant heat, and avoid overheating the floor to protect the wood.
- Laminate and Vinyl: Many laminate floors and luxury vinyl planks can be installed over radiant heating, as long as the product is rated for it. These materials may insulate more than tile, so the heat might take a bit longer to come through. Still, they can work well if you follow the manufacturer’s guidelines. Use underlayments and adhesives designed for heated floors as recommended. Keep in mind that thicker vinyl or laminate could slightly reduce efficiency (any flooring that adds insulation on top of the heater will decrease heat transfer).
Always verify the flooring material’s compatibility with radiant heating. Manufacturers often provide maximum temperature ratings or special installation instructions for using their product over heated subfloors. Using the right materials ensures your new heated floor is both comfortable and safe for your specific floor finish.
Set a Timeline
Plan the installation at a time that causes the least disruption to your life and aligns with any other home projects. Most radiant floor installations for a single room can be completed in about one to three days. This means, for example, a professional crew could retrofit heating mats and new flooring in your bathroom over a long weekend. Larger projects will naturally take longer. If you’re installing hydronic heating throughout your whole house or tackling it as a DIY project, be prepared for a longer timeline. Coordinate with contractors (flooring installers, plumbers, electricians) and build in some wiggle room in case of delays.
It’s often smartest to schedule heated floor installation during an existing renovation or construction project. If you’re remodeling your kitchen or building a new home, incorporate the radiant heating installation into that timeline so it happens while floors are already opened up. For example, have the installers put in the heating system right after the old flooring is demoed and before the new floor finish goes down. This will help you save time and avoid having to rip up floors again later.
Also consider the season. Installing in summer or early fall might be ideal so that your home’s primary heating isn’t needed during the short period when it might be offline. The key is to plan ahead so you know what to expect and won’t be caught without a usable floor (or heat) longer than necessary.
Prepare Your Space
Getting the room ready before installation day will make the process go much smoother. Start by clearing out all furniture and breakables from the area. If you’re installing radiant heat in an existing room, you’ll likely need to remove the current floor covering down to the subfloor. This may involve pulling up carpet, old tiles, or hardwood. Once the old floor is out, clean and prep the subfloor thoroughly. Make sure the subfloor is free of debris and as level as possible before the heating elements go in. An uneven or dirty surface can lead to problems, so this step is important for a quality install.
Next, check on any infrastructure requirements. For an electric radiant heat system, have a qualified electrician install a dedicated, GFCI-protected circuit in the room ahead of time. This guarantees the electrical wiring for the floor mats or cables is safe and up to code. For a hydronic system, you’ll need to plan where the manifold and boiler or water heater connections will go; make sure the installer has access to run the tubing to that equipment. It’s also wise to talk with your contractor about insulation beneath the heating system. Adding insulation boards under the heating elements (or insulating the joist space beneath the room) helps direct heat upward and improves efficiency.
As part of room prep, consider the floor height. Installing radiant heating panels, mats, and new flooring will raise the floor height slightly (often around 1/2 inch). Account for this by trimming the bottom of doors or adjusting floor transitions if needed, so doors will still open smoothly and there won’t be a tripping hazard between rooms. Finally, be prepared for a bit of dust and disruption. Lay down drop cloths or plastic sheeting to protect adjoining areas from debris when the old floor comes up. By fully preparing the space and having any needed utilities in place, you set the stage for a quicker and hassle-free heated floor installation.
Conclusion
Installing heated floors can be a fantastic upgrade that adds comfort and value to your home. The key is to approach the project with a solid plan. The preparation will pay off when you’re enjoying a cozy, evenly warmed space on the coldest of days. In the end, with the proper planning and execution, you’ll be able to savor the luxury of warm floors underfoot and a more comfortable home for years to come.