Architects and designers who follow re-thinkingthefuture.com spend a lot of time thinking about how built spaces meet the natural world, and a front or back lawn is one of the most immediate examples of that relationship for homeowners. The landscaping choices around a house, including something as ordinary as grass, shape how a structure reads from the street and how livable the outdoor space feels day to day. Sod installation sits at the intersection of design intent and practical maintenance, which is exactly the kind of topic that matters to readers who care about the full lifecycle of a property, not just its blueprints.
For homeowners in warmer, drier regions, sod is often the fastest way to close the gap between a bare or patchy yard and a finished, cohesive landscape design. Unlike seeding, which can take months and leave a yard looking uneven and vulnerable to erosion, sod delivers an established root mat that can be walked on within weeks. That speed matters for anyone trying to match a renovation timeline or simply wanting their landscaping to look intentional rather than half-finished. This guide walks through the actual sequence of steps, from soil prep to the final watering schedule, so you know what to expect at each stage.
Before you order a single pallet of grass, it helps to understand the financial side of the project so you can budget appropriately. Costs vary widely depending on yard size, soil condition, and the grass variety you choose, and labor rates differ by region and season. Getting a realistic number upfront also helps you decide whether to hire a crew or handle the installation yourself over a weekend.
Homeowners searching for SodLawn as a local resource will find that regional expertise matters more than generic advice, especially in climates with distinct wet and dry seasons. Southern California’s Mediterranean climate, with its long dry summers and mild wet winters, calls for grass varieties and installation timing that differ from what works in the Midwest or the Pacific Northwest. Choosing a supplier or installer familiar with local soil types and water restrictions can save you from replacing a lawn that fails within its first year.
Step 1: Prepare Your Soil, Remove Old Grass, and Level the Ground
Start by clearing the area completely. If you’re replacing an existing lawn, use a sod cutter or a flat spade to strip away the old grass and its root layer, since leaving dead turf underneath new sod creates an uneven surface and invites disease. Once the area is bare, till the soil to a depth of four to six inches, breaking up compacted dirt so new roots can penetrate easily. This is also the moment to work in compost or a starter fertilizer, since amending the soil now is far easier than trying to fix nutrient deficiencies after the sod is down.
After tilling, grade the yard so water flows away from your home’s foundation rather than pooling near it. Use a rake to smooth out high and low spots, then run a lawn roller over the area to firm the soil without over-compacting it. A level, firm base is the single biggest factor in how well sod knits into the ground, so it’s worth taking extra time here rather than rushing to the next step.
Step 2: Measure Your Lawn and Choose the Right Sod for Los Angeles
Measure the total square footage of your yard, breaking irregular shapes into rectangles and triangles to calculate area more accurately, then add roughly five percent extra to account for cutting and trimming around edges. This number determines how many pallets of sod to order and directly affects your total cost. Suppliers typically sell sod by the square foot or by the pallet, and ordering slightly more than you think you need avoids a mid-project delay waiting for a second delivery.
For Los Angeles lawns specifically, warm-season grasses like Bermuda, St. Augustine, and Zoysia tend to perform better than cool-season varieties because they tolerate heat and require less water once established. Local pests, including chinch bugs and certain grubs, also favor specific grass types, so matching your choice to regional conditions reduces long-term maintenance headaches. According to Home Advisor, professional sod installation costs between $1,079 and $3,067 depending on yard size and grass choice, with labor costs ranging from $0.50 to $1.00 per square foot.
| Cost Factor | Typical Range |
| Professional Installation (Total) | $1,079 to $3,067 |
| Sod Material Cost | $0.30 to $0.80 per sq ft |
| Labor Cost | $0.50 to $1.00 per sq ft ($35 to $80/hour) |
| Root Establishment Time | 2 to 6 weeks (bonds to soil in about 14 days) |
| Watering Frequency (First 14 Days) | 2 to 4 times daily in hot weather |
Step 3: Lay and Roll Your Sod in a Brick Pattern
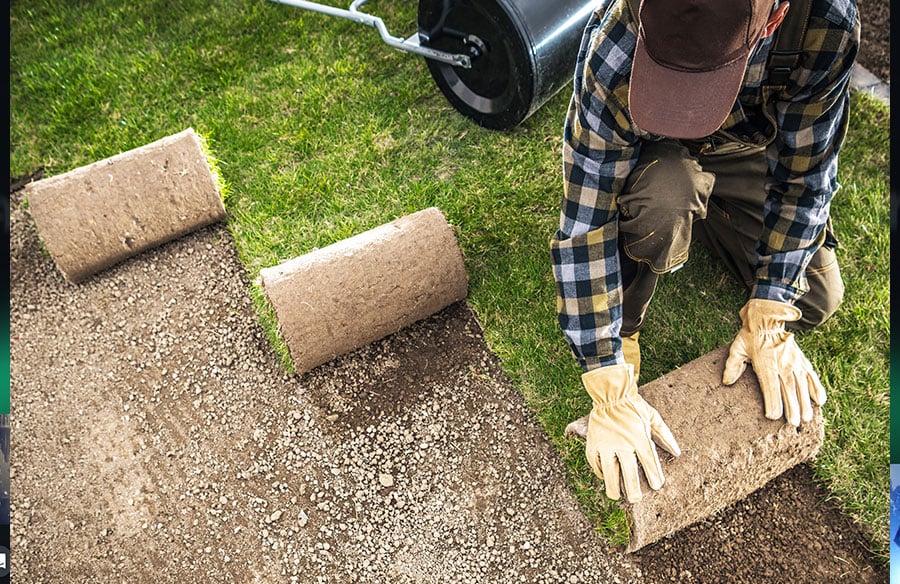
Begin laying sod along the longest straight edge of your yard, such as a driveway or sidewalk, to create a clean reference line. Lay each strip tightly against the next, staggering the seams like bricks in a wall so they don’t line up in continuous rows, which helps prevent gaps from widening and drying out. Press each piece firmly against its neighbor without overlapping or stretching the sod, since gaps between strips are one of the most common causes of visible seams later on.
Once an entire section is laid, use a lawn roller filled with a small amount of water to press the sod into the soil below, eliminating air pockets that would otherwise dry out roots before they can establish. Trim edges around walkways, flower beds, and irregular corners with a sharp utility knife rather than forcing whole pieces to fit. Working in manageable sections and rolling as you go, rather than waiting until the entire yard is covered, keeps the sod from drying out mid-installation on a hot day.
Step 4: Water and Establish Your New Lawn Over 2 to 4 Weeks
Watering begins immediately after installation, and it’s the most important factor in whether your new sod survives its first month. For the first fourteen days, water two to four times daily in hot weather, aiming to keep the top three to four inches of soil consistently moist without creating standing water on the surface. Roots typically begin bonding to the soil within about two weeks, though full establishment can take anywhere from two to six weeks depending on grass type and weather conditions.
After the initial two-week period, gradually reduce watering frequency while increasing the duration of each session, encouraging roots to grow deeper in search of moisture. Hold off on mowing until the sod resists a gentle tug, which signals the roots have anchored into the soil below. With consistent care through this establishment window, your new lawn should be ready for normal foot traffic and regular maintenance within a month, giving your property the finished look that complements everything else you’ve invested in your home’s design.