Essential Safety Precautions and Monthly Inspection Routine
Before you grab your tools or start tinkering with your garage door system, safety must be your absolute priority. A residential garage door is often the largest moving object in your home, and it is powered by systems under significant tension. Before performing any garage door maintenance tips, always disconnect the power to the opener by unplugging it from the ceiling outlet. This prevents the door from being accidentally activated while your hands are near moving parts.
If you are working on the door in an open position, use a sturdy clamp on the track just below the bottom roller to prevent the door from slipping downward. Always wear protective gloves and safety glasses to shield yourself from debris or sharp metal edges. When inspecting the system, notify other household members that you are working on the door so no one attempts to operate it while you are in the middle of a task.
Visual Inspection of Moving Hardware
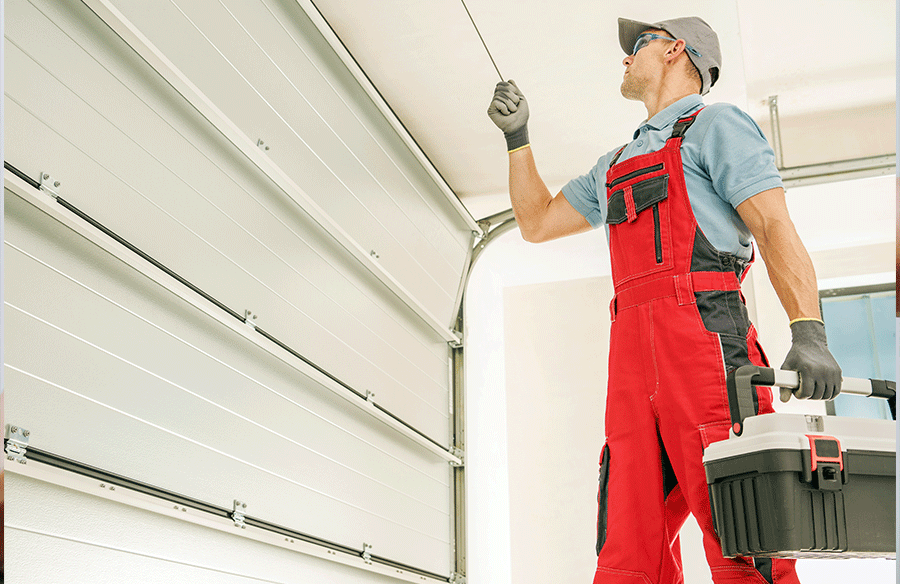
Once you have secured the area, start with a comprehensive visual sweep. With the door closed, stand inside the garage and examine the entire lift system. Look closely at the lift cables; if you see signs of fraying, rust, or strands beginning to unwind, this is a red flag that requires immediate professional attention. Next, check the pulleys and mounting hardware. Over time, the constant vibration of the door can cause bolts to loosen. Use a wrench to tighten any loose fasteners on the tracks and hinges, but be careful not to overtighten, as this can strip the threads. Inspect the rollers for chips or cracks—plastic rollers, in particular, tend to degrade after six to eight years due to UV exposure and constant compression.
Monthly Safety Tests for Garage Door Openers
Federal law requires that garage door openers manufactured after January 1, 1993, include a reversing mechanism and a photo-eye sensor system. Testing these is a mandatory part of your monthly routine.
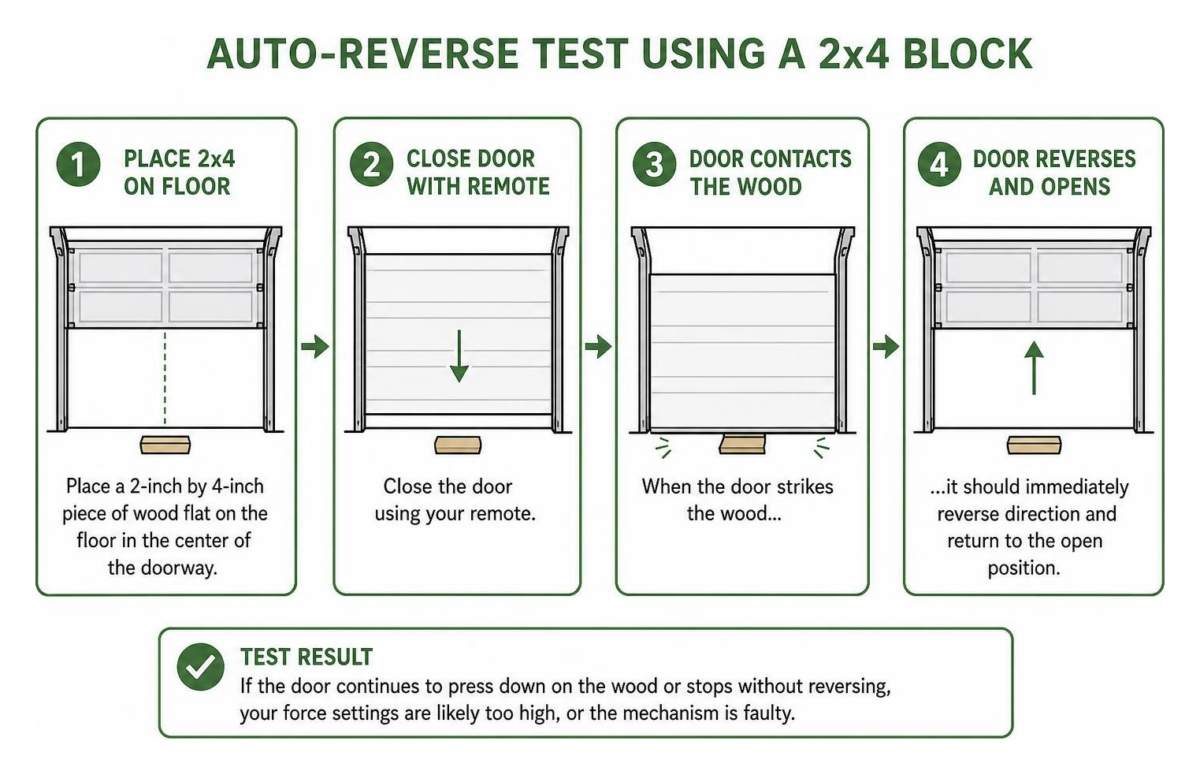 To test the auto-reverse feature, place a 2-inch by 4-inch piece of wood flat on the floor in the center of the doorway. Close the door using your remote; when the door strikes the wood, it should immediately reverse direction and return to the open position. If it continues to press down on the wood or stops without reversing, your force settings are likely too high, or the mechanism is faulty.
Next, test the photo-eye sensors. These are the small sensors located near the floor on either side of the door. With the door open, press the close button and, while the door is descending, pass a broomstick through the path of the beam. The door should stop and reverse instantly. If it does not, clean the lenses with a soft, dry cloth and ensure they are perfectly aligned. If they still fail to trigger a reversal, you may need a professional inspection to address potential wiring or board issues.
Essential Garage Door Maintenance Tips for Smooth Operation
The longevity of your garage door depends largely on how well you manage friction. Metal-on-metal contact is the enemy of a quiet, efficient door.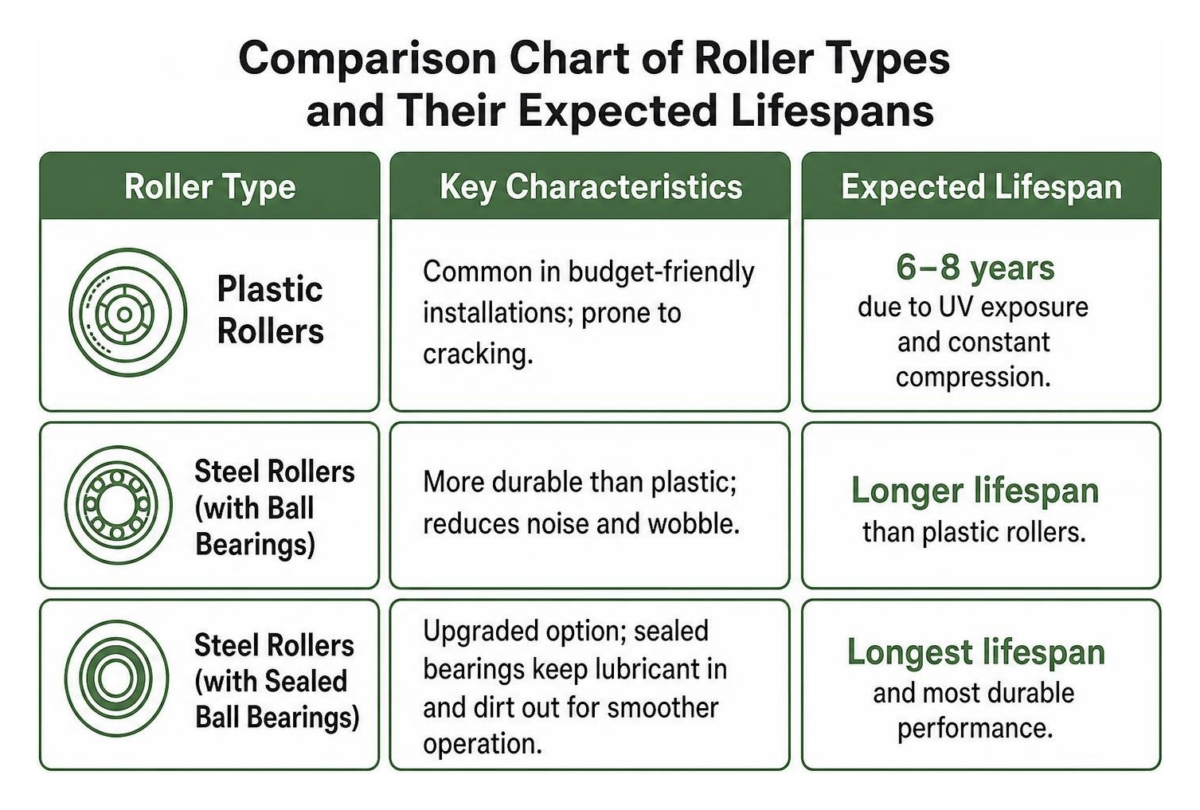
While plastic rollers are common in budget-friendly installations, they are prone to cracking. If you find your door is noisy or wobbling, upgrading to steel rollers with sealed ball bearings can significantly quiet the operation and extend the life of your hardware.
Garage Door Maintenance Tips for Lubrication and Track Care
Lubrication is the single most effective way to prevent premature wear. Every six months, apply a high-quality white lithium grease or a specialized garage door lubricant to the hinges, rollers, and the bearings within the rollers. Avoid using standard household lubricants like WD-40, which can act as a solvent and strip away the protective grease already present in the bearings.
When lubricating the tracks, be sparing. The rollers should glide smoothly, but the tracks themselves should actually be kept clean and relatively dry. Use a lint-free cloth to wipe away any built-up grime, dust, or old, hardened grease from the interior of the tracks. If you have a chain-drive opener, a light coating of white lithium grease along the chain rail can help, but check your manufacturer’s manual first, as some screw-drive openers require specific lubricants or no lubrication at all.
Weatherstripping and Exterior Surface Upkeep
The bottom seal and side weatherstripping act as your home’s first line of defense against the elements, rodents, and debris. Inspect these seals every few months. If the rubber appears brittle, cracked, or has gaps, it is time for a replacement. Replacing a bottom T-rubber seal is a manageable DIY task: simply slide the old seal out of the track at the bottom of the door, clean the track, and slide the new seal in.
For the door surface itself, avoid the temptation to use a pressure washer. High-pressure water can force moisture into the door’s core or damage the finish. Instead, use a soft-bristled brush and a solution of mild detergent mixed with warm water. This gentle approach cleans away salt, dirt, and road grime, preserving the finish and preventing rust on metal doors or rot on wood doors.
Opener Electronics and Hardware Adjustments
Your garage door remote and keypad are the “brains” of the operation. If you notice the range of your remote is decreasing, the first step is to replace the coin-cell batteries. Most modern openers also feature a battery backup system, which should be tested and replaced every few years to ensure you aren’t locked out during a power outage.
If your opener has a light bulb, ensure you are using a vibration-resistant bulb. Standard bulbs often burn out prematurely due to the constant shaking of the motor housing. If the door seems to be struggling to open or close, check the drive tension. A chain or belt should have roughly a quarter-inch of play from the bottom of the rail. If it is sagging significantly, it may need a minor adjustment, but always follow the manufacturer’s specific instructions for your model.
Troubleshooting Minor Issues and When to Call a Professional
Even with the best maintenance, you may eventually notice a hitch in the door’s operation. If the door becomes jerky or makes a grinding noise, it is often a sign of binding.
Fixing Sticky Rollers and Jerky Movement
If the door seems to “jump” at certain points along the track, check for debris or minor misalignments. Sometimes, a track bracket may have loosened, causing the track to pull away from the wall. By loosening the bracket bolts slightly, you can nudge the track to ensure it is perfectly vertical and aligned with the roller path, then tighten it back down. Ensure there is about a quarter-inch of clearance between the roller stem and the track to prevent binding.
Critical Garage Door Maintenance Tips for High-Tension Hazards
While there is much you can do as a homeowner, there is a clear line between routine maintenance and high-risk repair. Never, under any circumstances, attempt to adjust or replace the torsion springs or the bottom brackets attached to the lift cables. These components are under extreme tension and are responsible for balancing the weight of the door. A sudden release of this tension can cause catastrophic injury. If you suspect a spring is broken—often indicated by the door being too heavy to lift manually or a loud “bang” heard in the garage—stop using the door immediately and call a qualified professional.
Frequently Asked Questions About Garage Door Maintenance
How often should I perform DIY garage door maintenance?
We recommend a quick visual inspection every month to catch loose hardware or frayed cables. A more thorough maintenance session, including lubrication of all moving parts and testing the safety mechanisms, should be performed at least twice a year.
Can I use standard WD-40 to lubricate garage door parts?
It is best to avoid standard WD-40. It is primarily a degreaser and water displacer, not a long-term lubricant. It can actually wash away the existing lubricant in your bearings, leading to faster wear. Stick to white lithium grease or specialized silicone-based garage door sprays.
How do I know if my garage door balance is off?
To test the balance, disconnect the opener using the manual release cord while the door is in the closed position. Carefully lift the door by hand. It should move smoothly and stay in place when you let go at the halfway point. If the door slams shut or flies upward, the spring tension is incorrect and requires professional recalibration.
Conclusion
A little bit of attention goes a long way. By incorporating these DIY steps into your seasonal home care routine, you can ensure your garage door remains a reliable, safe, and quiet part of your daily life. Regular inspections and timely lubrication prevent the buildup of friction and grime that leads to expensive, emergency service calls. Keep your system clean, listen for changes in operation, and always know when to defer to the experts. When you stay on top of these tasks, you protect your investment and ensure your garage door continues to operate smoothly for years to come.